Translate

2024年7月25日星期四

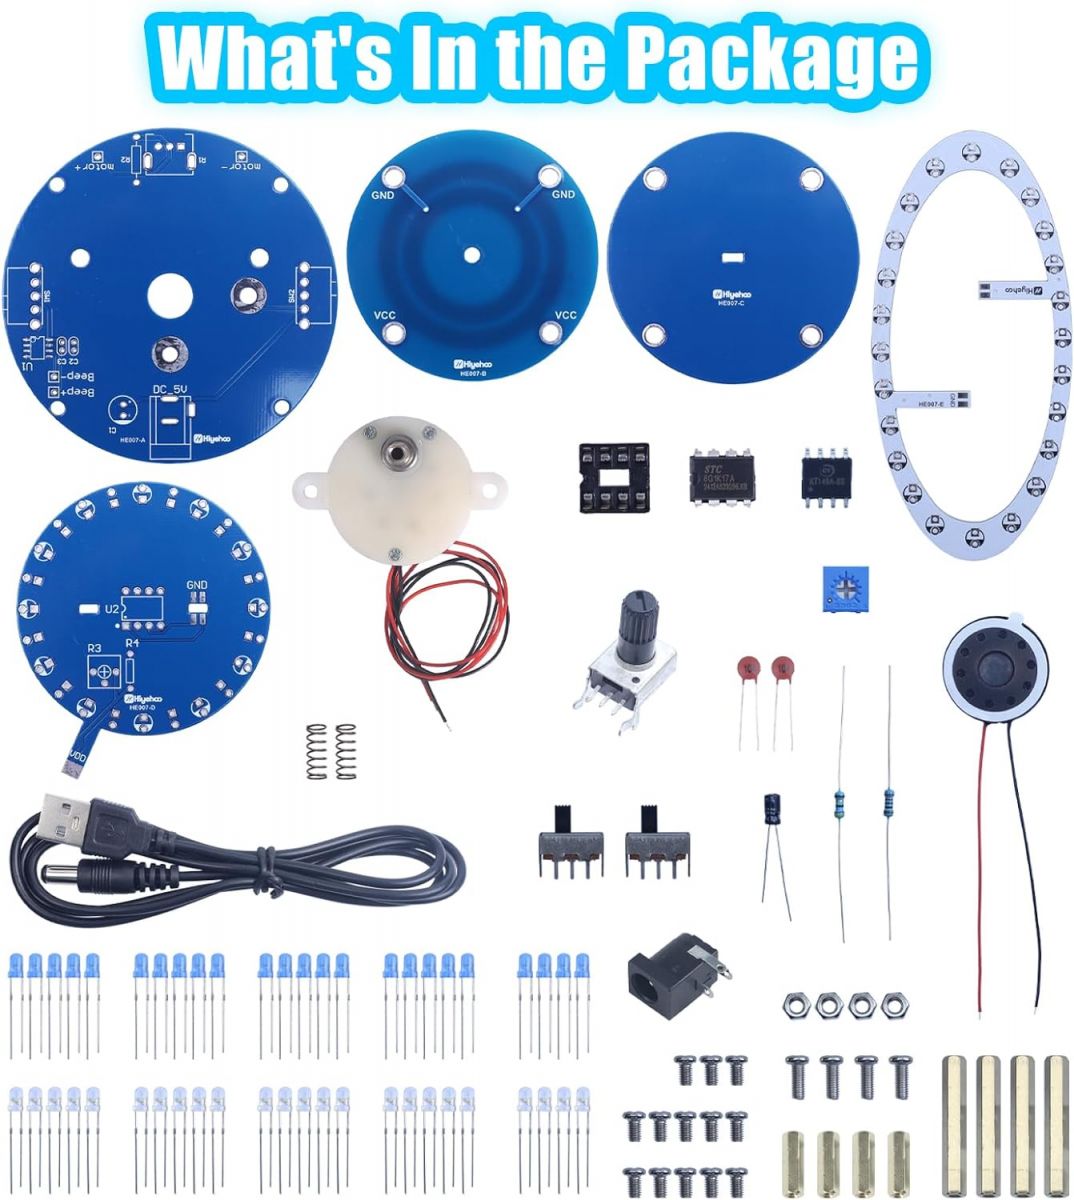
LED Rotating Globe Planetary Project for STEM Teaching and Soldering Learning

Explore ICStation Latest New Product -  DIY Globe Planetary Motion Kit DIY Rotating Universe Model Soldering Practice Kit!

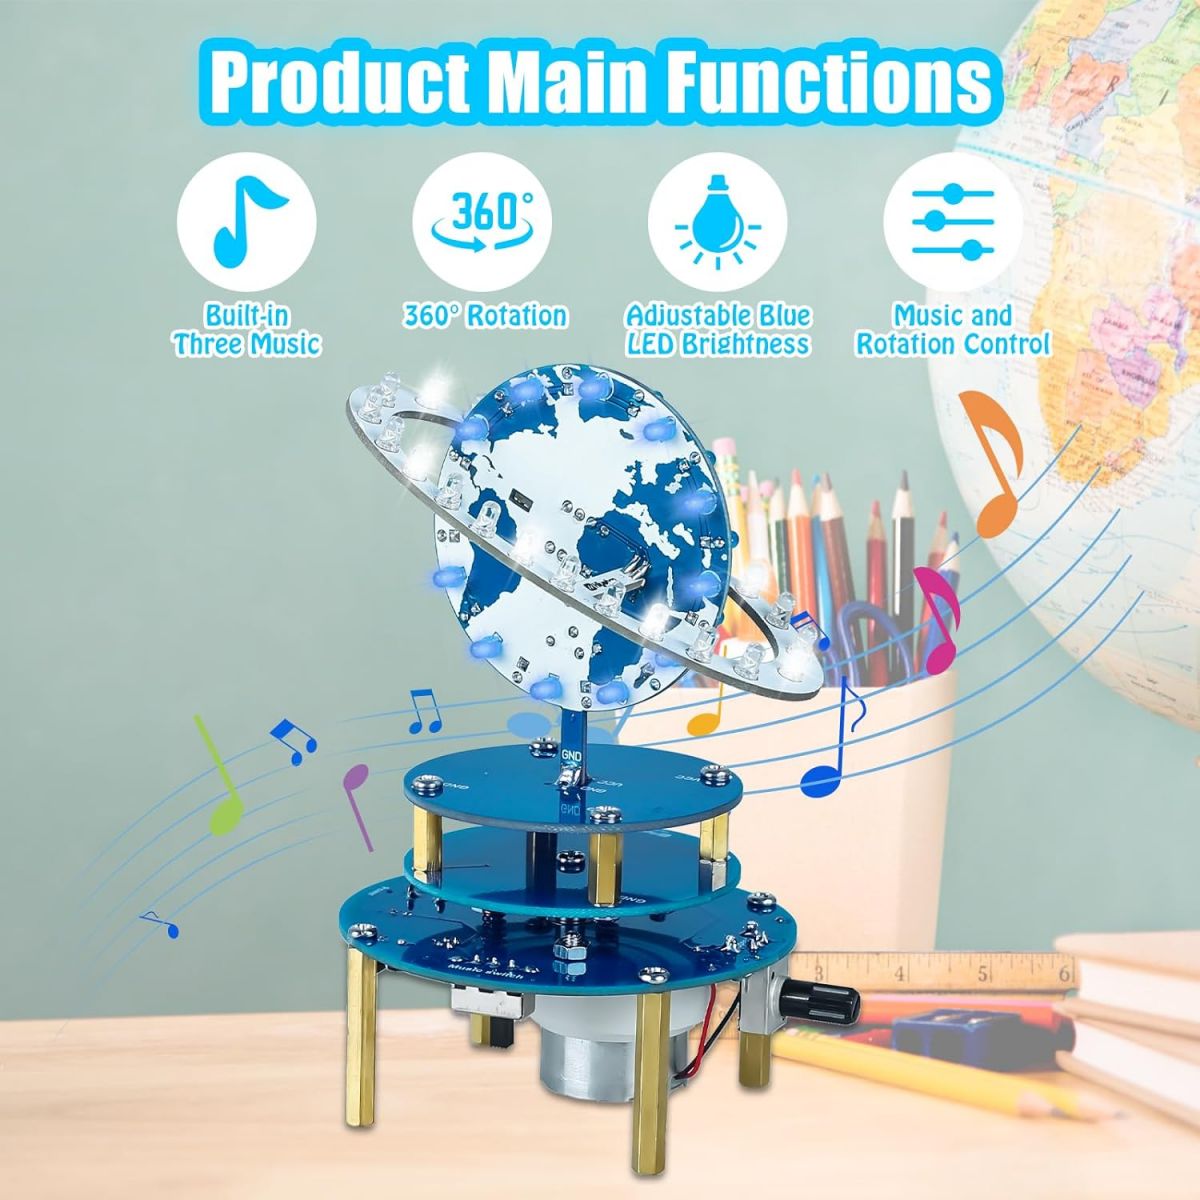
The Flashing LED Globe DIY Kit adopts a PCB three-dimensional structure design combined with motor rotation and LED light flashing circuit.Built-in 3 music atautomatic looping playing mode if turn ON music play switch. Also can adjusting the rotational speed. It is a very interesting DIY electronic kit which enables users to learn soldering skills.


Feature:

ROTATING PLANETS】The lights on the elliptical PCB board of the DIY soldering kit illuminate in turns, creating a rotating effect akin to small planets, which is quite captivating. The exquisite design of the white waterfall light, with its interplay of light and shadow, seems to narrate a fantastical journey through the universe. Paired with such a unique lighting fixture, it enhances the indoor decor ambiance, allowing one to experience the mystery and beauty of the cosmos.

BRIGHTNESS ADJUSTABLE】DIY soldering practice kit comes with a circular PCB board equipped with a potentiometer, allowing you to adjust the brightness of the blue LED lights. You can customize the lighting to a comfortable level according to your preference. This is a fun and practical project, suitable for soldering enthusiasts to practice their soldering skills and understand circuit principles.

SPEED SWITCH】The base of the DIY globe kit is equipped with a motor, allowing the globe to rotate 360 degrees, adding a futuristic touch to it. By controlling the motor switch, you can observe various aspects of the kit, as if being immersed in the universe. Whether as a learning tool or a decorative piece, this rotating globe is a creative and enjoyable choice.

BUILT-IN THREE MUSICS】The planetary kit comes with three sci-fi-inspired music tracks, allowing you to immerse yourself in the wonderful spectacle of planets orbiting the Earth. The music playback adds dynamism and emotion to this planetary model, making observations more vivid. Equipped with separate control switches, you can freely choose to turn the music on or off, making the experience more personalized.

This kit is perfect for: 

1.Desk decoration 

2.STEM Teaching 

3.Graduation design 

4.Practice for electronic enthusiasts 

5.Birthday gifts 

6.Home Family Projects 

Ready to start building? Click here to get your rotating global universe kit from us! 


2024年7月11日星期四

ICStation Latest New Product Wearable Seashell SMD Light Learn to Solder Kit Launched!
 Dear friends,

Hope everything goes well with you! 

Today we are going to introduce 1 of our latest new products, developed by ICStation team, a fun and educational soldering project for beginners/childern to learn soldering, hope you will like it.


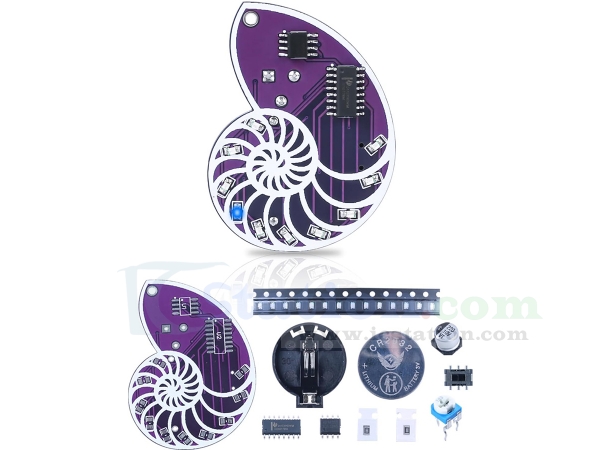
This SMD soldering kit is with a unique design of sea snail shaped in purple. You can not only exercise your soldering ability and enjoy the fun of soldering, but also get a special conch shaped flow lamp pendant. Attach it to bags, walls, or decorations for an enchanting glow.

Feature:
[Ideal for Beginners on Soldering] The flowing lights soldering kit contains a conch shaped circuit board and 18 components. Although it involves SMD soldering , there are clear electronic component marks on the circuit board, and there are fewer components than professional SMD soldering circuit boards. Follow our detailed User Manual to learn it and finish it in 30 minutes.Perfect for beginners, college students, adults, and soldering enthusiasts.

[Top Choice for Education & Learning] Equip your classroom with ICStation's SMD learner solder kit, perfect for students to master simple soldering and circuits while crafting a personalized decoration. Ideal for crafting heartfelt gifts for Mother's or Father's Day, this kit offers a rewarding learning experience with a touch of creativity.

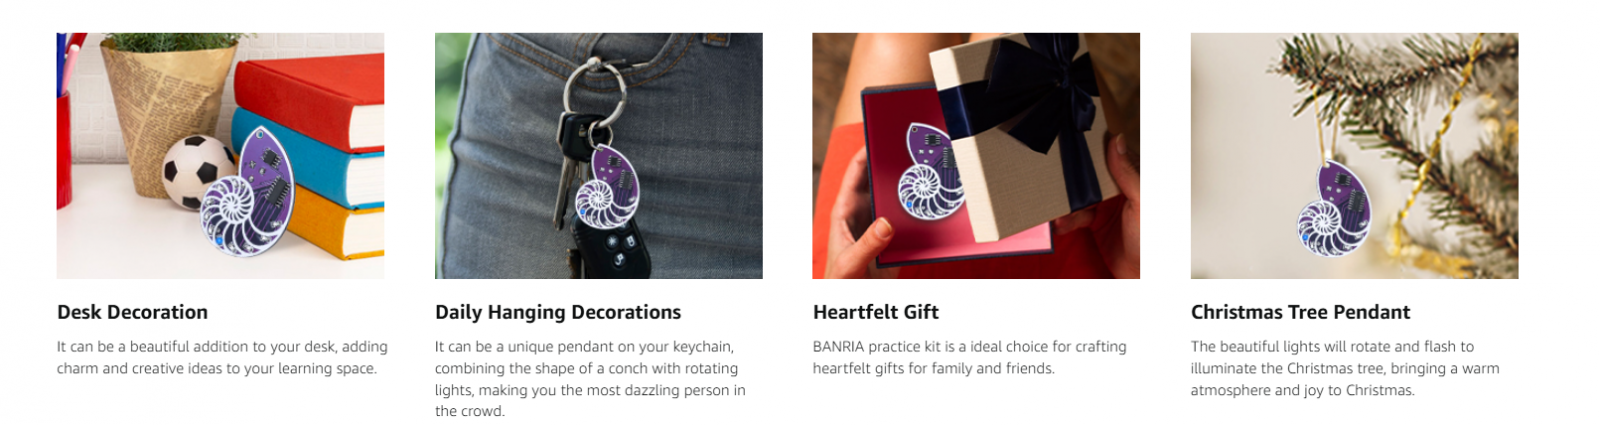
[Fancy Decoration]  The conch-shaped flowing lights is paired with a delicate pattern of purple and white on the front, gorgeous blue LED lights. And you can adjust the speed of the LED lights to get different feelings. And a specially designed round hole allows us to string it as an ornament in any way we like. Hang it on the wall or desk at home, hang it in the backpack or car, including anywhere you can think of, you can also give it as a beautiful gift to someone who will be sure to be happy.

[User Manual] A paper user manual is included. Scan the QR code to download the detailed PDF installation guide.


Thank you for your attention! For more new products, please check ICStation.com:)


2024年6月28日星期五

LED Rotating Ballerina Girl Music Box Soldering Project Soldering Learning Electronics Kit

1. Description of the Project

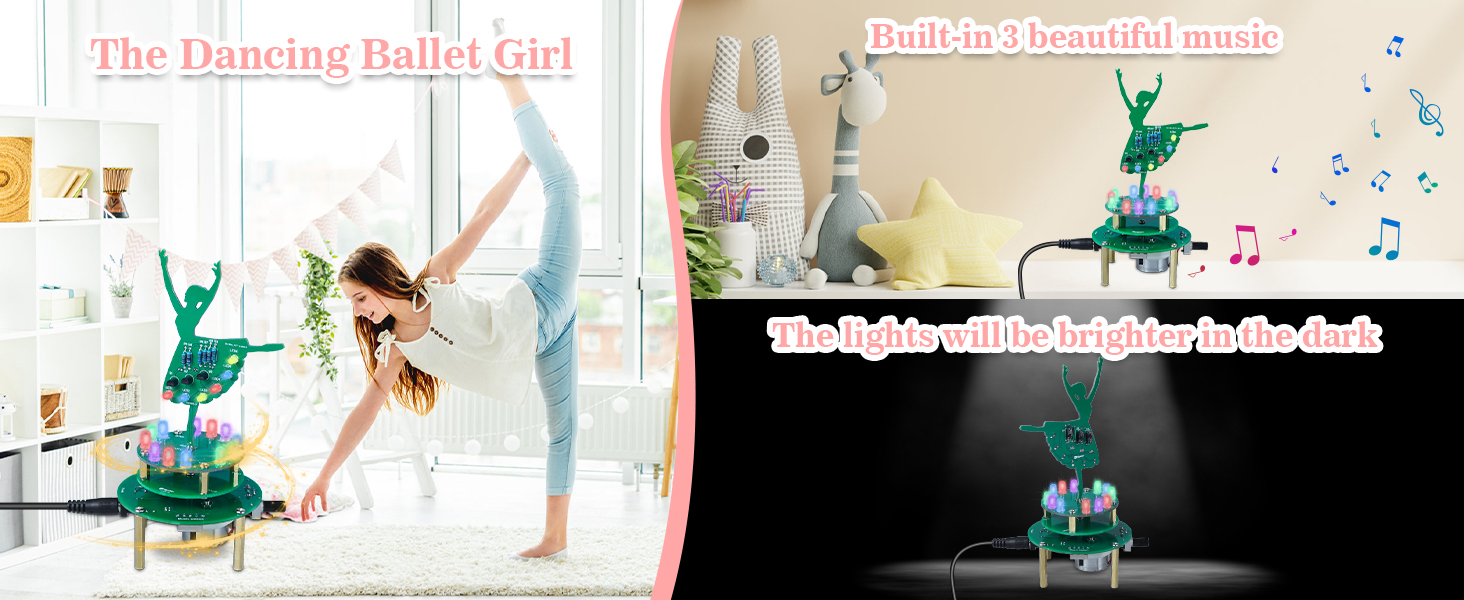
You will create a beautiful LED Rotating Ballerina Girl Music Box using ICStation's DIY soldering kit. This project combines electronics, soldering, and creative design to produce a functional and elegant music box. The ballerina rotates gracefully while the LED lights create a mesmerizing visual effect, making it a perfect gift or decorative piece.

2. What Will You Learn?

In completing this project, you will:

  • Soldering Skills: Practice and improve your soldering techniques, both through-hole and surface mount.
  • Circuit Assembly: Understand the process of assembling electronic components on a PCB (Printed Circuit Board).
  • LED Programming: Learn how LEDs can be controlled to create visual effects.
  • Mechanical Assembly: Gain experience in assembling mechanical parts to create a functional moving object.
  • Problem-Solving: Enhance your problem-solving skills as you troubleshoot and ensure the music box operates smoothly.

3. How Does the Project Work?

The ICStation LED Rotating Ballerina Girl Music Box combines multiple STEM concepts to create a captivating project.

Electronics: The project involves assembling a circuit that includes LEDs, resistors, capacitors, and a motor driver. The LEDs are programmed to light up in a sequence that complements the rotation of the ballerina, creating a visually appealing effect.

Mechanics: The music box's movement is powered by a small DC motor that rotates the ballerina. This motor is controlled by the assembled circuit, which ensures synchronized movement with the LED lights.

Engineering: The construction of the music box requires careful assembly of both electronic and mechanical components. Understanding how each part fits together and operates is crucial for the successful completion of the project.

STEM Concepts:

  • Electromagnetism: The DC motor uses electromagnetic principles to convert electrical energy into mechanical motion.
  • Electrical Circuits: The project teaches the basics of electrical circuits, including the flow of current and the role of different electronic components.
  • Programming Logic: The LED sequence involves programming logic that can be adjusted to change the visual effects.

By working on this project, you will gain a deeper understanding of how electronic components interact, the importance of precision in assembly, and the joy of creating a functional and aesthetically pleasing piece of technology.


2024年6月6日星期四

Police Car DIY Soldering Project for Beginners

Explore the Exciting World of Soldering with Our Police Car Kit! 🚔

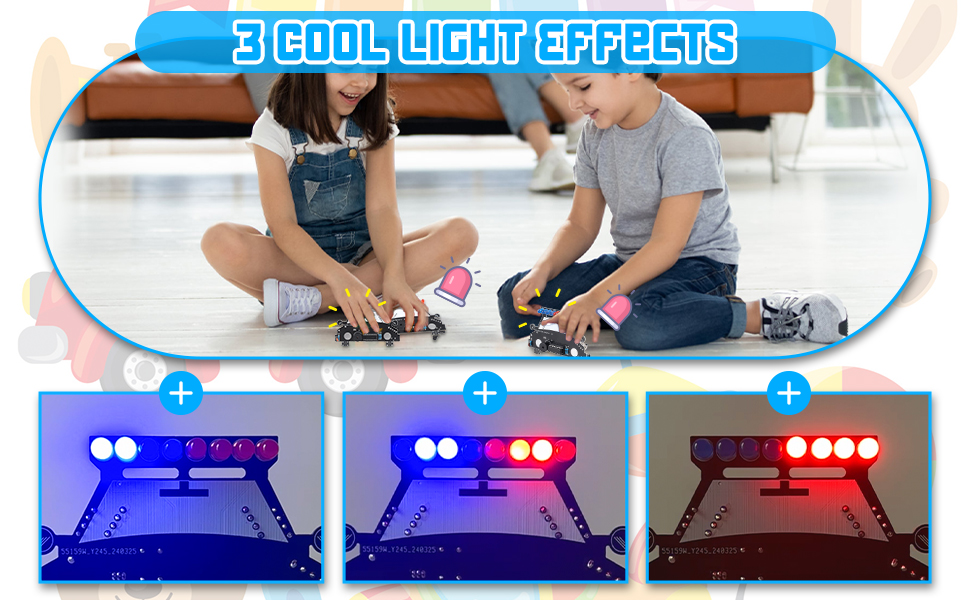
Get ready for an adventure in DIY electronics with our Police Car Soldering Practice Kit! This kit features the stylish design of a police car, complete with black and white colors and a realistic appearance that lets you experience the thrill of police work.

Turn on the dial switch, and the siren will sound continuously, simulating the action of a police pursuit, adding an extra level of excitement to your soldering experience.

Not only does this soldering kit provide endless fun and entertainment, but it also helps you hone your soldering skills. It's the perfect project for school students who want to learn the art of soldering while immersing themselves in a thrilling DIY adventure.

Looking for a unique and creative gift for your son or grandson? Look no further! Our soldered police car kit is the ideal choice for a one-of-a-kind gift that will spark their imagination and provide hours of enjoyment.

Don't miss out on the fun – grab your Police Car Soldering Practice Kit today! 🔧🎁


2024年5月29日星期三

ICStation Cake Tower Soldering Project Kit

 About this item

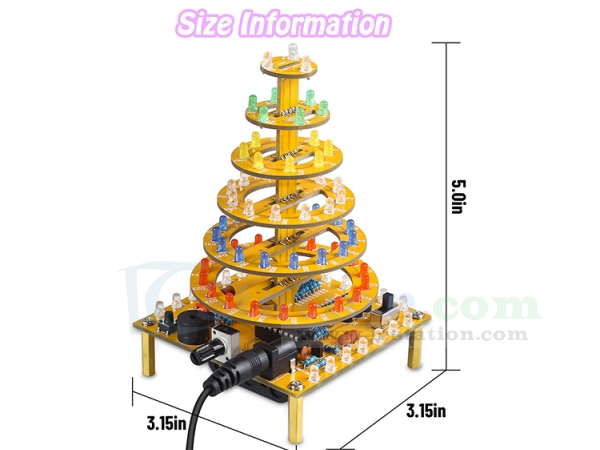
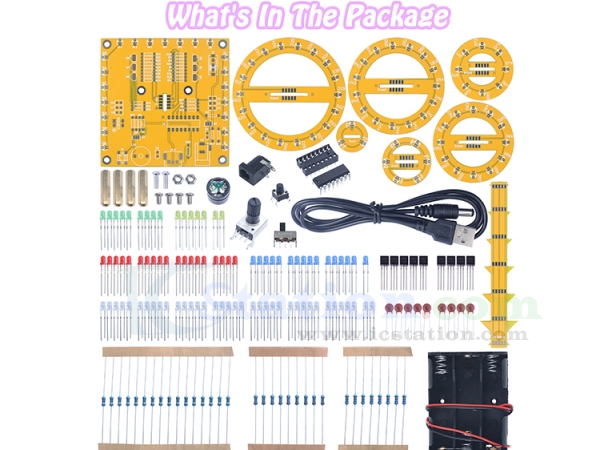
【 Cake Tower Soldering Kit 】Inspired by the concept of the cupcake tower, we've embarked on an exciting new soldering project: the Cake Tower soldering project. This innovative endeavor features a square circuit board as the base, supporting six layers of circular hollow circuit boards that serve as the cake stands. LED lights are ingeniously arranged to simulate cupcakes, creating a visually striking and novel design that instantly captures attention.

【 Happy Birthday Music 】Pressing the button adjacent to the buzzer triggers the buzzer to play the "Happy Birthday" song, adding a delightful touch to the Cake Tower soldering project. This feature makes it an ideal birthday gift for your daughter, son, partner, friends, and more. Additionally, it can serve as a charming centerpiece on the table, enhancing the birthday celebration ambiance and creating lasting memories with loved ones.

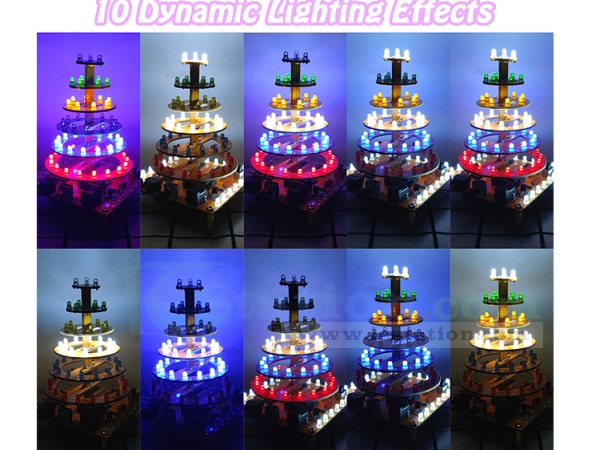
10 Lighting Effects】Upon being powered on, the LED lights on the cake tower will initiate flashing. We have incorporated 10 distinct flashing modes, along with knobs for adjusting the flashing speed. With 5 vibrant colors of light and various flashing modes, this feature enhances the ambiance of your party, offering a unique and immersive experience.

2 Power Supply Modes】For convenience, a USB power cord is included, allowing you to simply plug it in and turn on the switch to illuminate the cake tower. Additionally, the cake tower comes equipped with a battery box at the bottom, accommodating 3 AA batteries (not included), providing portability and versatility. Whether powered by USB or batteries, you can easily take it anywhere you go.

Nice Gift】If you're seeking to create a truly personalized gift for a friend or family member, the cake tower soldering project is an ideal choice, particularly as a birthday present. Its unique combination of creativity and functionality makes it a perfect gift option.


2024年5月22日星期三

Airplane Flashing LED Light Kit, Soldering Project for STEM Teaching School Students Learning

    ICStation DIY Airplane Flashing LED Kit for STEM Learning Home Education - First Soldering Projects for DIYers Students Beginners


1.Introduction:
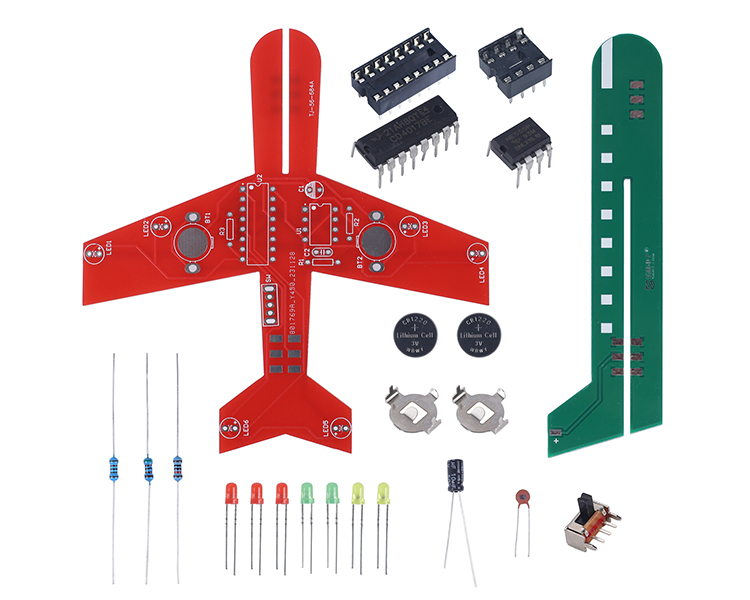
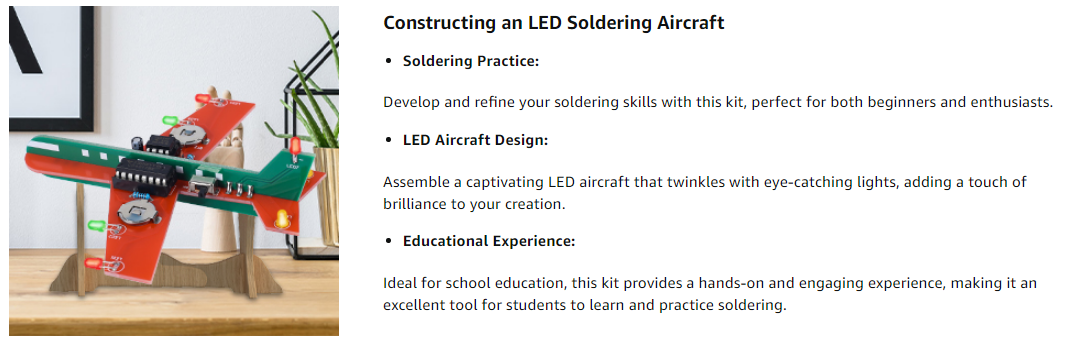
It is an Airplane Flashing LED Circuit Electronic Kit. It can simulate the flickering effect of airplane lights and create a very artistic desktop decoration.

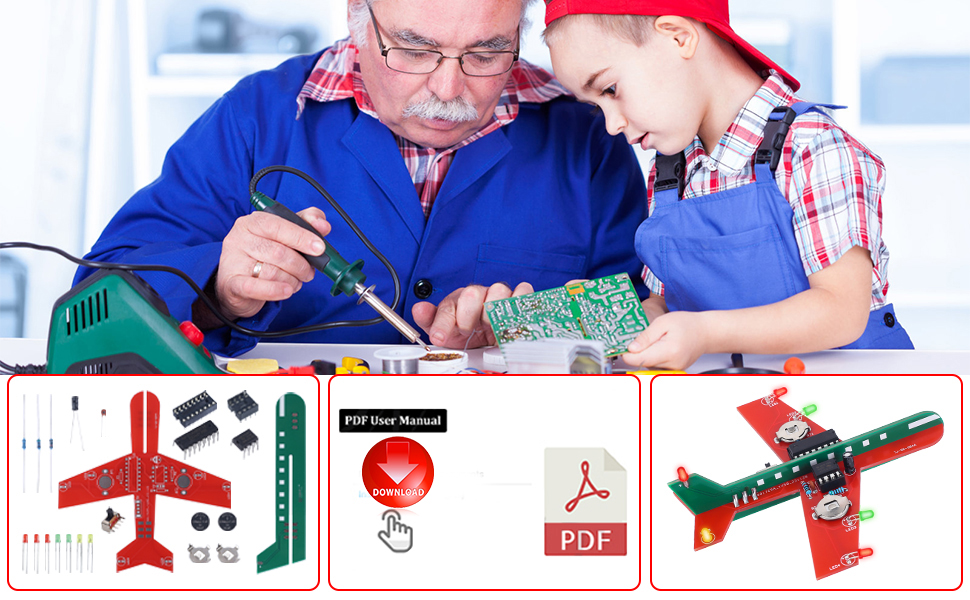
Soldering Learning】 The airplane kit includes a few DIP components and 7 LED flashing lights, making it suitable for beginners to grasp basic circuit knowledge and practice soldering skills. Follow the detailed instruction manual, it takes approximately an hour for you to complete the soldering of this kit. The soldering process is relatively simple, making it an ideal choice for beginners. Please pay attention to the polarity of the components during soldering.

School Education】This airplane kit can be served as a part of DIY projects, igniting students' creativity and interest in electronic devices. It can also be utilized in Science, Technology, Engineering, and Mathematics (STEM) courses, assisting students in applying theoretical knowledge to practical scenarios.

Creative Gift】 You can personally solder and DIY an airplane flashing kit as a unique gift to surprise your loved one. Alternatively, spend a memorable time with your son, daughter or grandson during a special soldering practice. Place it in the living room or on a desk, and it will become an exquisite decoration!

Detailed Installation Manual】 No need to worry about soldering operations. We've prepared a detailed graphic manual for you, both in PDF and Paper Instruction available. Refer to the manual, follow the steps patiently. If any issues during the assembly, feel free to contact us.

2.Parameter:
1>.LED color: Red/Green/Yellow
2>.Battery type:CR1220 
lithium battery (included)
3>.Work Temperature:-20℃~85℃
4>.Work Humidity:0%~95%RH
5>.Size(Installed):110x105x33mm

3.Component listing:


2023年11月15日星期三

Electronics Calculator Kit Build

1.Introduction:
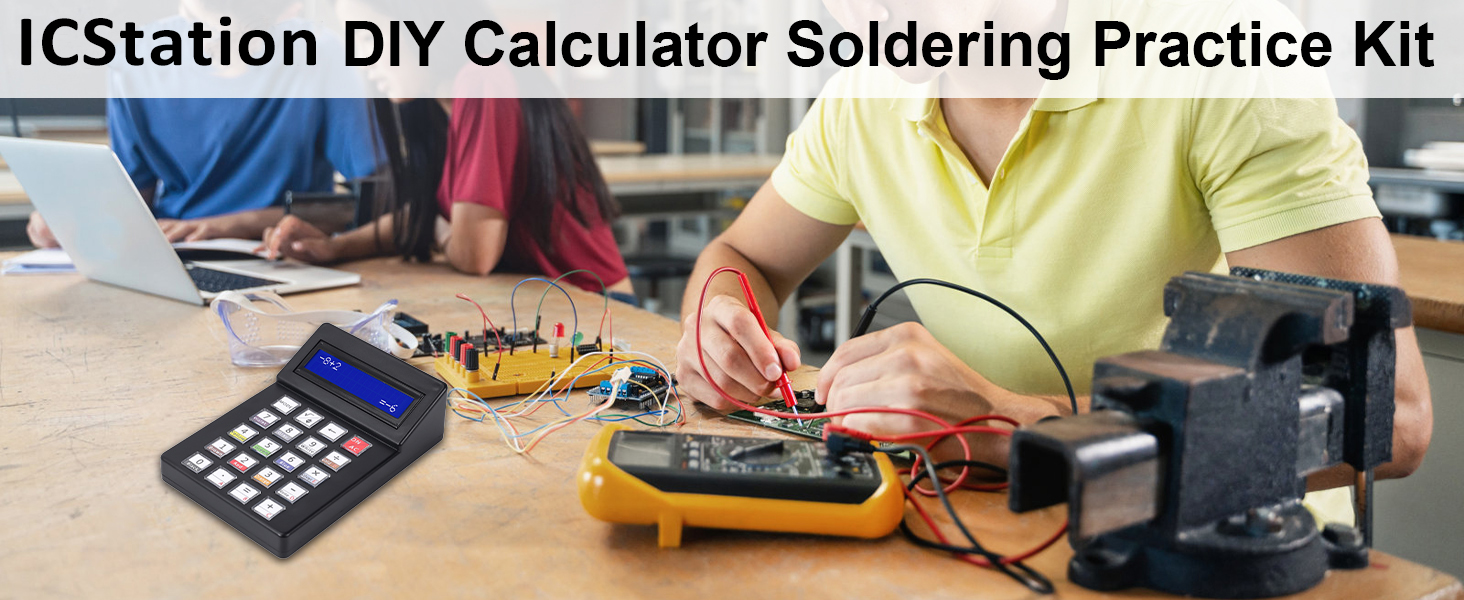
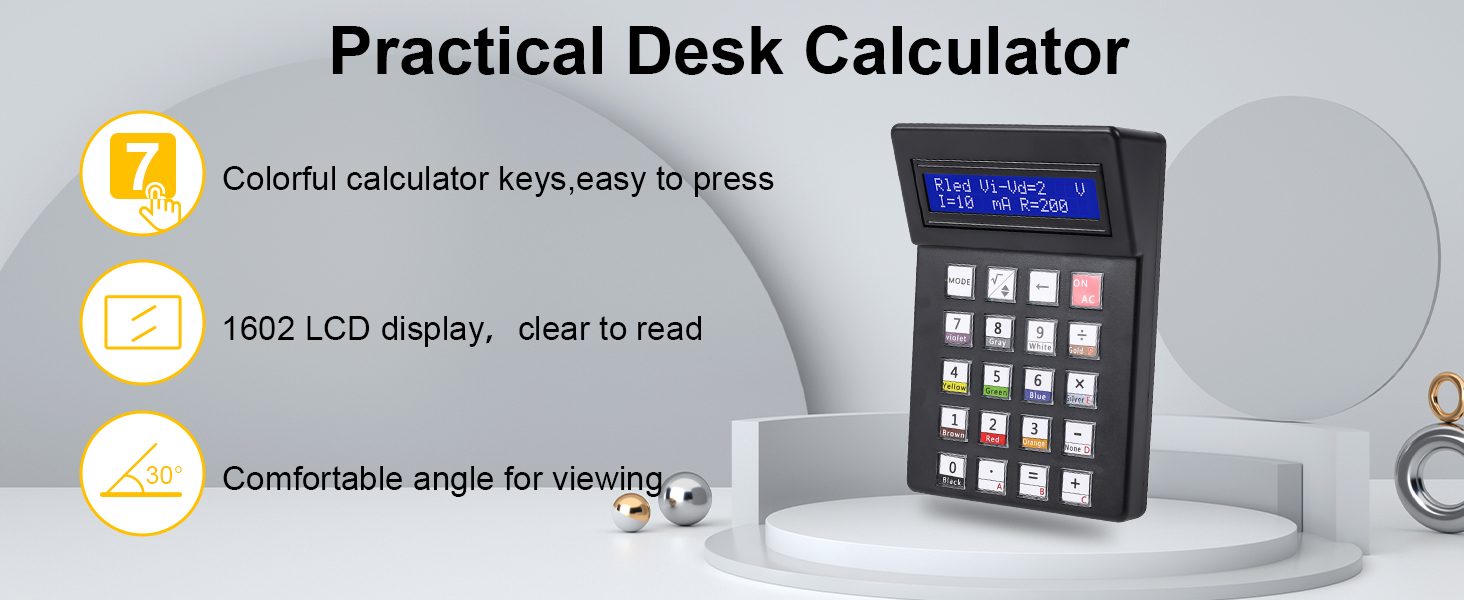
  ICStation Multi-functional Calculator DIY Kit is powered by two CR2032 button batteries, integrates five different computing functions, and uses a traditional LCD1602 display screen to display the calculation process and results in real-time.

  It can not only be used as a DIY electronic kit that allows you to better understand the circuit and learn how to soldering, but also as a very suitable experimental workbench tool.

2.Feature:
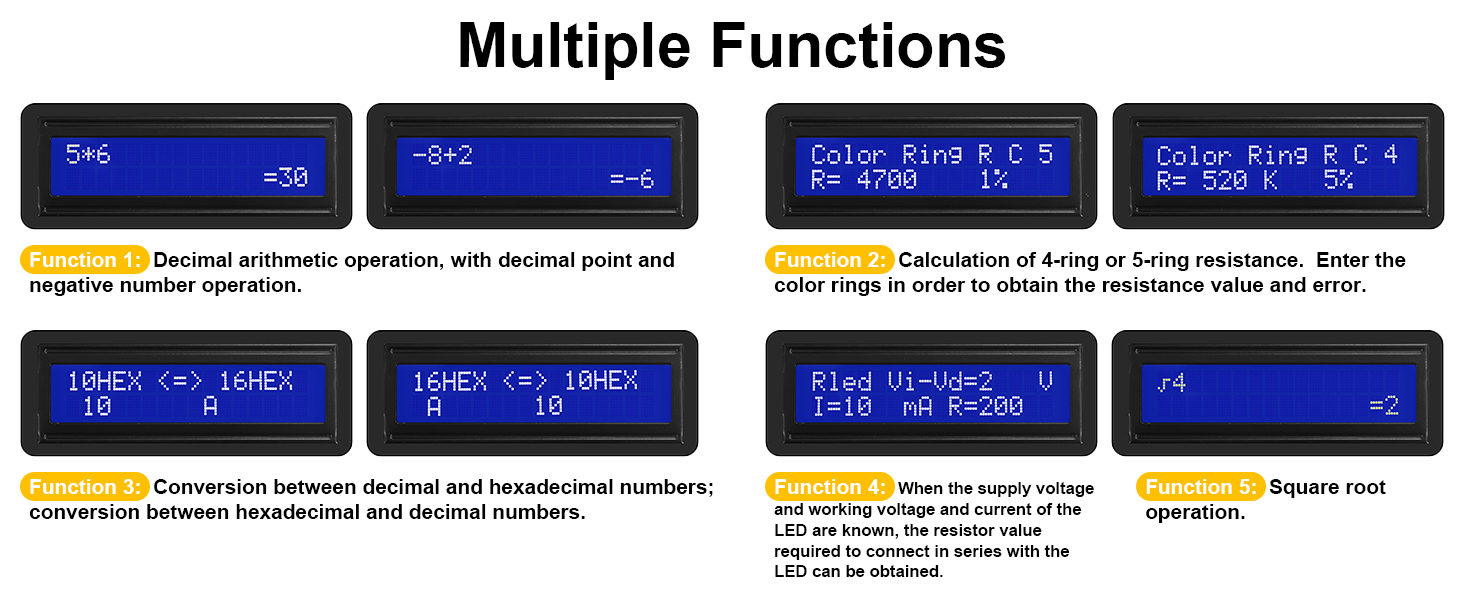
   Basic Arithmetic Calculator.
   4-Color or 5-Color Ring Resistance Calculator.
   Calculate the working series resistor for LED.
   Decimal to Hexadecimal.Hexadecimal to Decimal.
   Arithmetic Square Root Calculator.
   Classic LCD1602 LCD Display Screen.
   4*5 Transparent Matrix Keyboard.
   Automatic power off without operation within 30 seconds.
   Cool DIY Soldering Project.

3.Parameter:
   Work voltage: DC 6V
   Display Color: Blue/White Screen
   Power Type: CR2032*2 Battery (included)
   Work Temperature: -40℃~85℃
   Work Humidity: 5%~95%RH
   Size(Installed): 126x86x36mm

4. More About this kit:
    Function-1: Basic Decimal Arithmetic Calculator with decimal point and minus sign.
    Function-2: 4-Color or 5-Color Ring Resistance Calculator. Input the color of the metal film  

    Function-3: Calculate Series Resistor for LED.
    Function-4: Decimal to Hexadecimal and Hexadecimal to Decimal.
    Function-5: Arithmetic Square Root Calculator.
    Automatic shutdown: Automatic power off without operation within 30 seconds.
    After installation, it can be powered and used directly by two RC2032 batteries (included).


2023年2月23日星期四

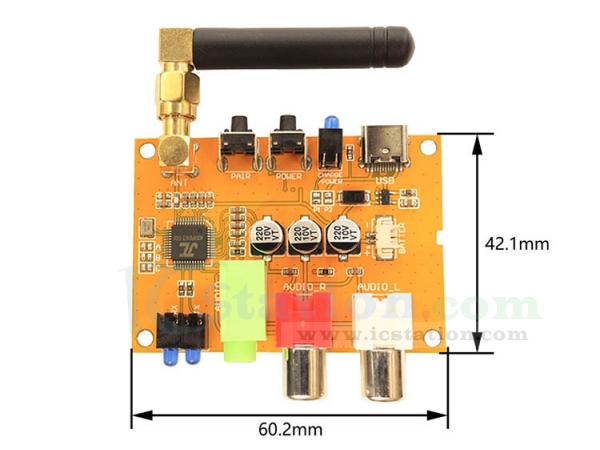
ICStation Latest New Products Bluetooth Transceiver Module Release!

Dear friends,

Hope everything goes well with you! 

Today we are going to introduce 1 of our latest hot sale new products, hope you will like it.


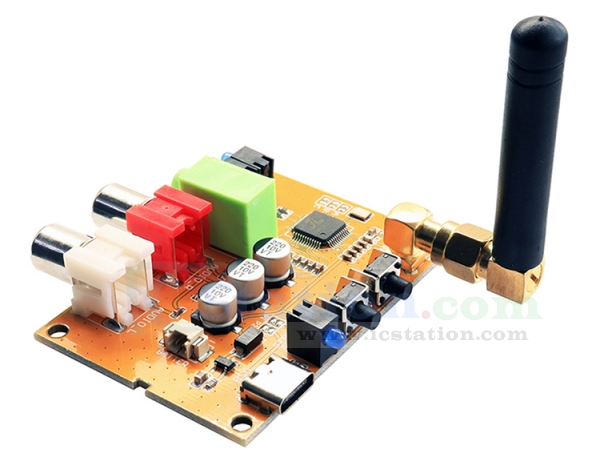
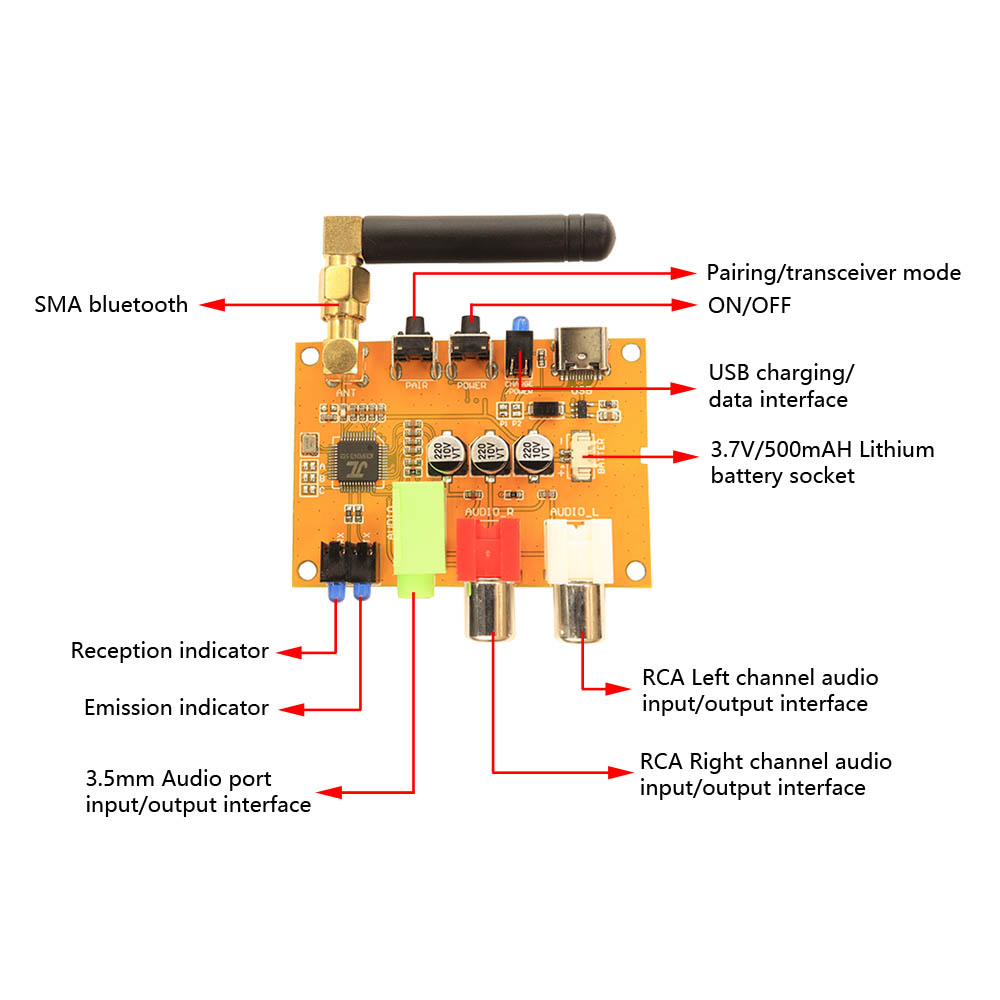
  It is a DC 3.3V 5V Bluetooth 5.3 GFSK Stereo Wireless Audio Transceiver Module Board with the following features: 
  •   Support automatic connection back of Bluetooth devices that remember the last automatic connection.
  •   Transmit mode and receive mode are indicated by independent LED.
  •   Support 3.7V and 500mA lithium battery power supply.

And below are some basis parameters of it:
  •   Bluetooth device name: Bluetooth Audio
  •   Work voltage: 3.5-5V
  •   Work current:  35mA
  •   Launch distance: ≤20m
  •   Rf output power: +5dBm
  •   Rf frequency range: 2402-2480MHz
  •   Audio dynamic range: 80dB
  •   Audio total harmonic distortion plus noise: -70dB
  •   Audio Frequency: 20Hz-20KHz
  •   Audio signal to noise ratio: 95dB
  •   Transmission delay: 250-300 ms


Thank you for your attention! For more new products, please check ICStation.com:)


2023年2月17日星期五

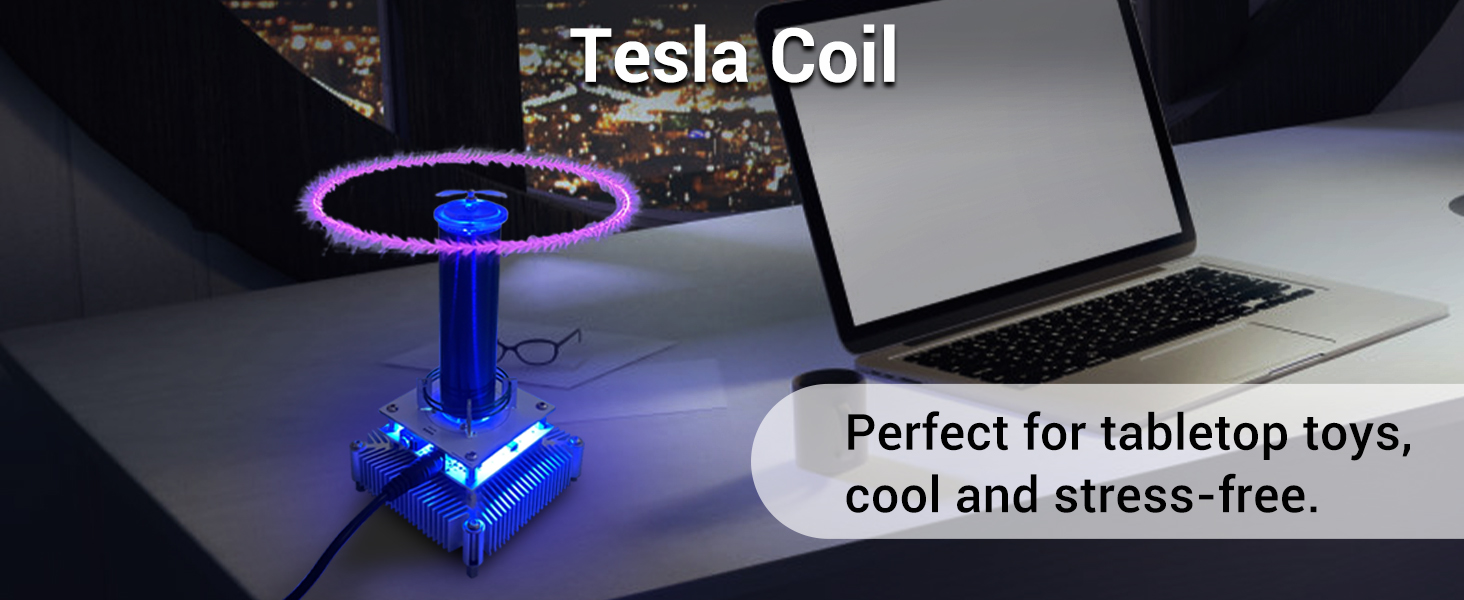
Bluetooth Music Tesla Coil, Technology Science Experiment Project

Bluetooth Music Tesla Coil

Hi friend! Hope you all doing well!  Today, we want to introduce a latest new product of icstation Music Tesla Coil, Electric Arc Plasma Generator Loudspeaker.  

When we were children, we always full of expectation to the unknown world. We ever imagined stepping on the water, also imagine ourselves flying in the sky. I imagined that when I pick up a lamp, it will shine when it sits on my hands. It doesn't need to nailed to the ceiling or pinned to the wall anymore. 

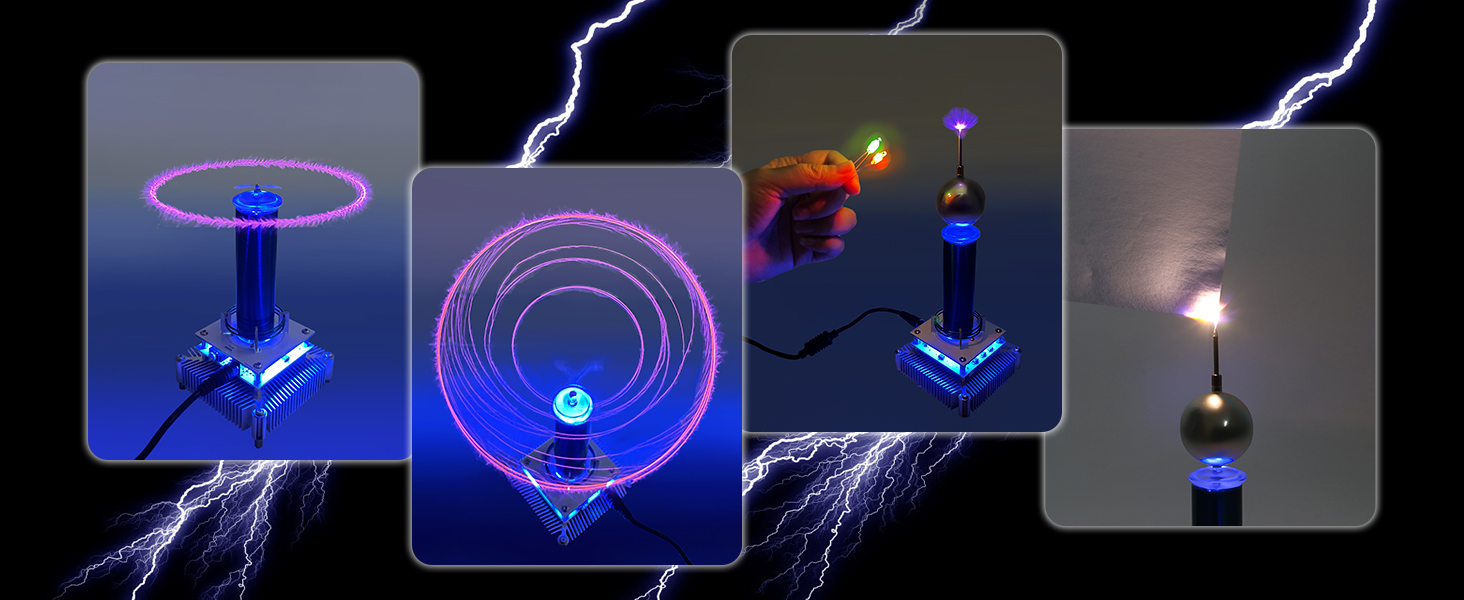
Now, this tesla coil makes dream true. What a marvelous little thing! It lights the bulb without any connection. This tesla coil is a wonderful conversation piece. It’s a cool piece of art even just stands on your desk.

About this tesla:
MUSIC PLAYBACK METHOD: The Music Tesla Coil Kit includes an audio cable that you can use to connect to your computer or cell phone to play music. Or you can use your cell phone to connect to the Tesla Coil's Bluetooth (YSKJ-18A) to play music. It does not distinguish the format of music files and the sound quality is clear.

GOOD HEAT DISSIPATION: There is a fan at the bottom of the Tesla coil and the bottom of the Tesla coil consists of a large aluminum heat sink. When the Tesla coil is working, the fan will start automatically. This ensures that the Tesla coil can work longer without being damaged by overheating.

IGNITER: The Tesla coil has a large arc, so it can be used as an igniter, which can easily ignite paper and other items. So please make sure to keep it away from flammable and explosive items when using it. The electric arc can form a plasma speaker to play music clearly.

EASY TO OPERATE: You will receive a finished Tesla coil and some accessories (including ion wreath, ion windmill, neon lamp, etc.). The accessories include a power cord, you just need to connect the power and you can have a very fun and cool desktop toy.

PERFECT FOR GIFT: This musical Tesla coil is perfect for your desktop toy, and the Bluetooth music sound quality is perfectly suited to your daily needs. It is also perfect as a gift for friends, kids, co-workers, etc. They will be happy to have such a fun gift.

Here is a short video for your reference,hope you will like it. If you want to have a try with this tesla, get one from www.ICStation.com easily:) 


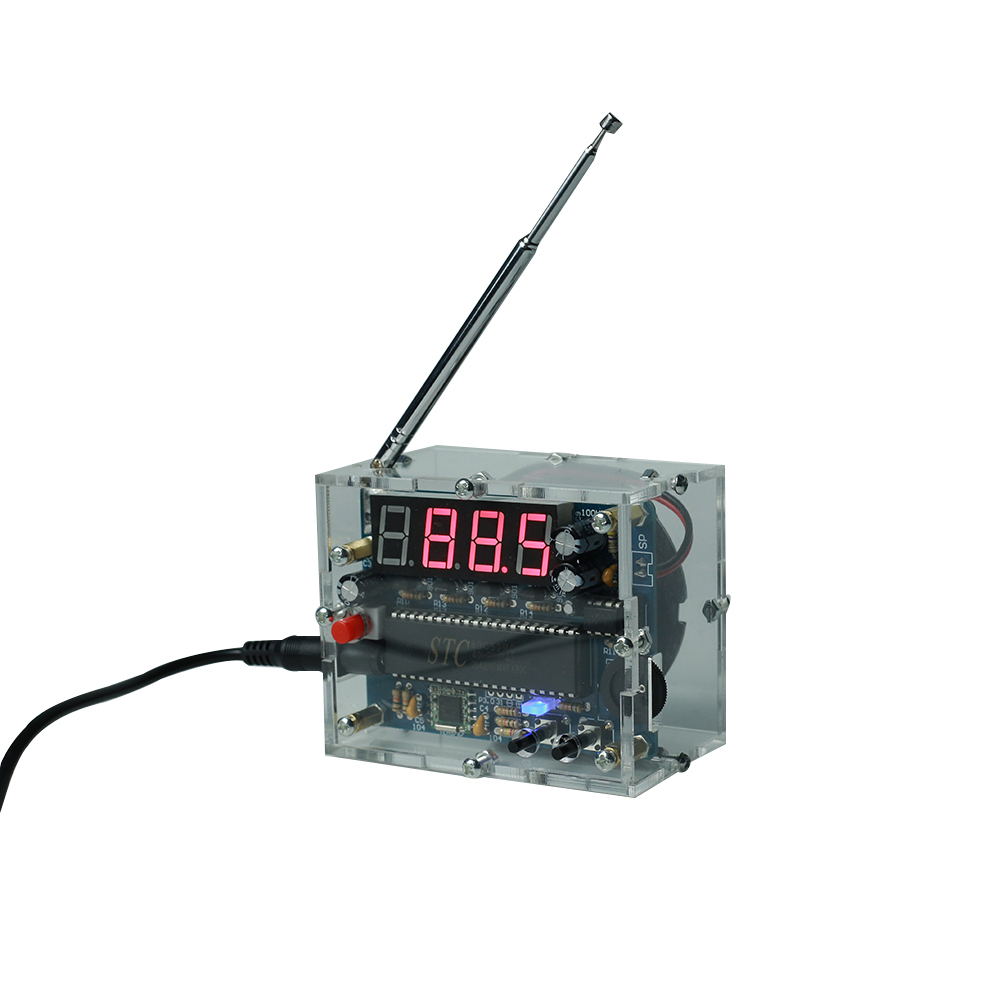
FM Radio - Clock Kit From ICSTATION

2021年8月10日星期二

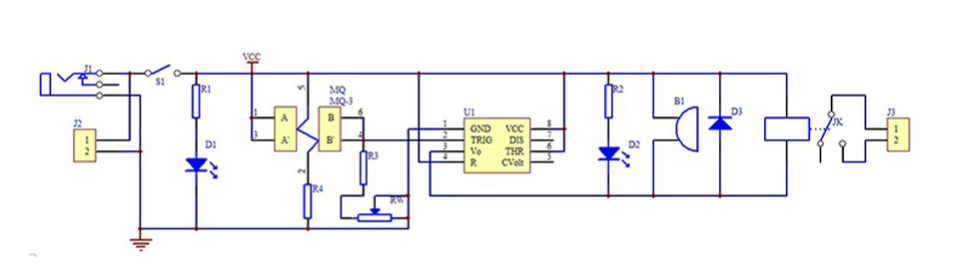
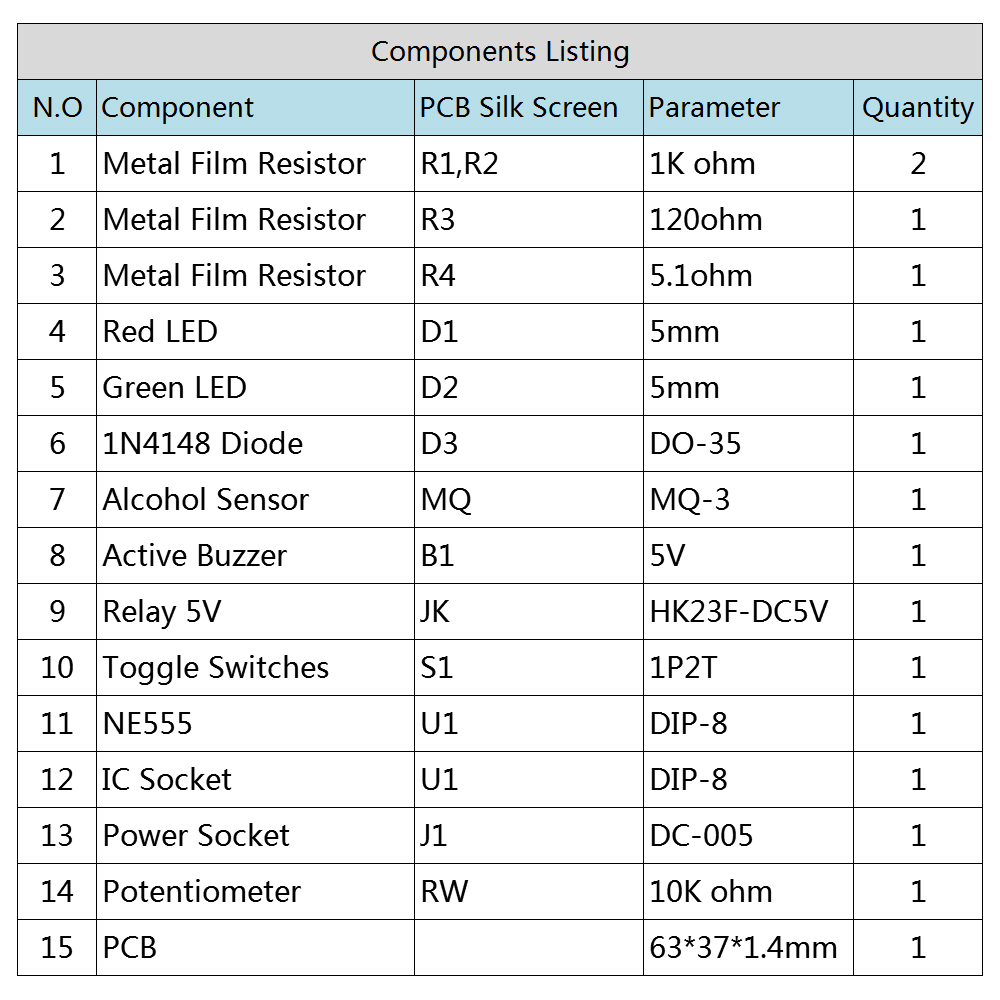
LED Alcohol Tester DIY with MQ-3 Sensor - KIT by ICStation


Description: 
  • Alcohol concentration alarm circuit This circuit is mainly an alarm control circuit formed by the gas sensor group MQ-3.
  • When the sensor MQ-3 is in the environment where alcohol vapor exists, the conductivity of the sensor will be the same as the alcohol vapor concentration.
  • By measuring the series partial pressure between the sensor and the fixed resistor, the alcohol content in the environment can be judged.


2021年7月30日星期五

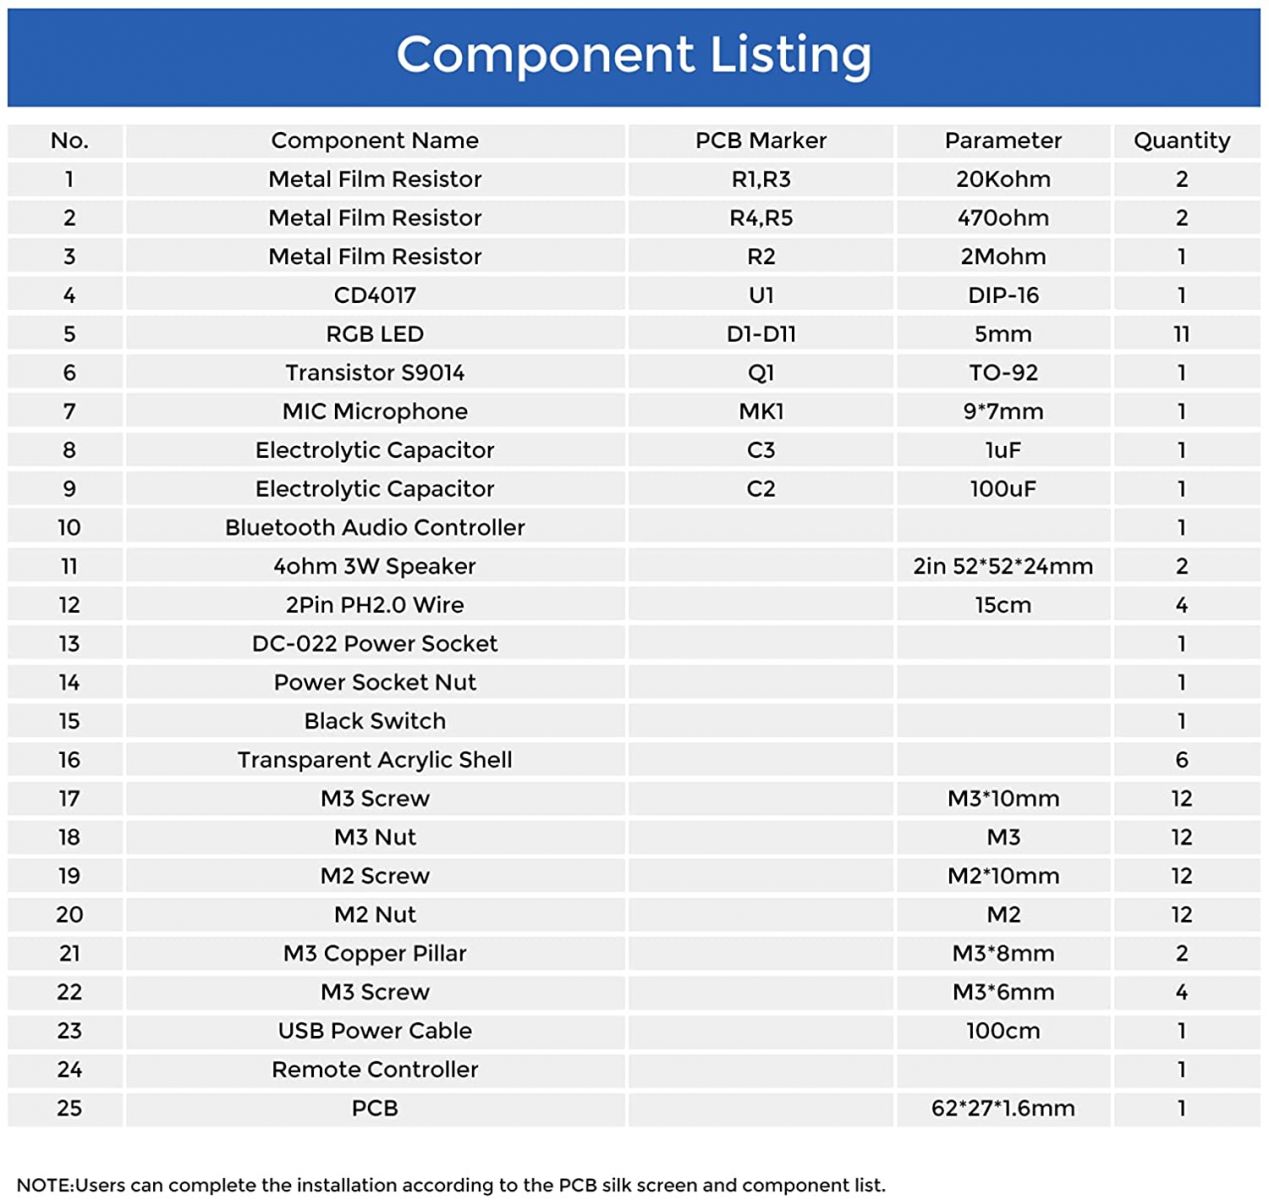
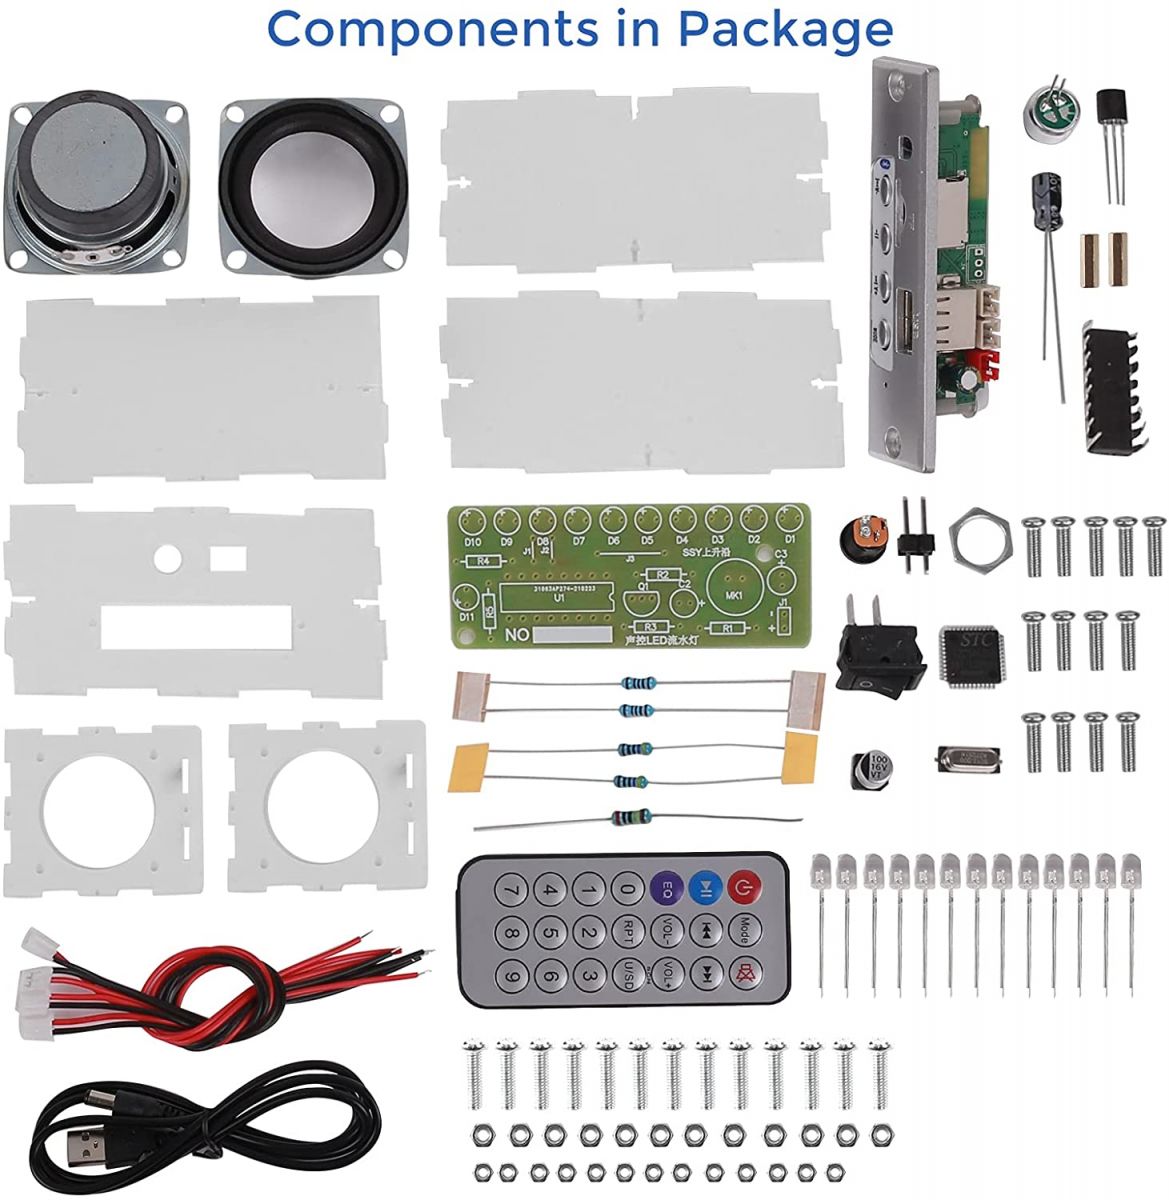
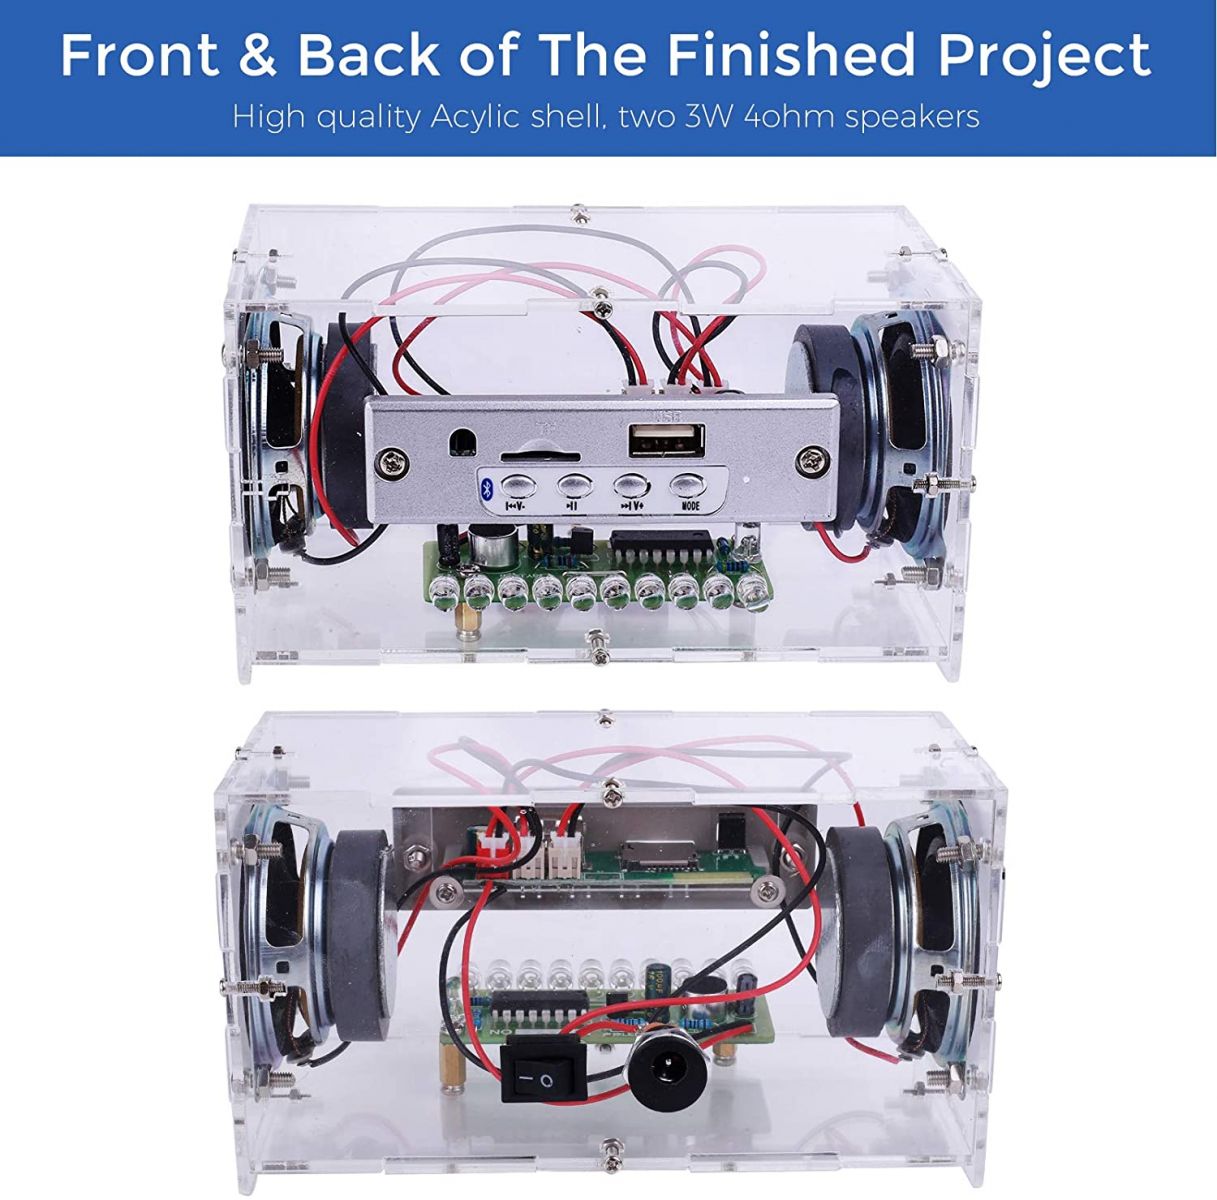
ICStation $18 DIY Bluetooth Speaker Electronics Kit Review

Introduction:
It is a RGB LED Spectrum Bluetooth Audio Speaker DIY Kit with remote control.
It has 10pcs RGB LED music spectrum display.
It can play music form Bluetooth, TF Card, U-disk with 4ohm 2in speakers.
 
Feature:

1.Music spectrum display
2.BLE5.0 Bluetooth audio play
3.Support TF Card and U-disk music
4.Remote controller

Parameter:
1.Item name: RGB LED Spectrum Bluetooth Audio Speaker DIY Kit
2.Work Voltage:DC 3.7V-5V
3.Bluetooth Distance:15meters (Max)
4.Amplifier Power: 3W*2
5.Music Source: Bluetooth/U-disk/TF Card
6.Control Type: Bluetooth/Remote Controller/On Board Button
7.LED Color: Yellow/Green/Red/Blue
8.Work Temperature:-40℃~85℃
9.Work Humidity:0%~95%RH
10.Size(Installed):135*74*64mm

Bluetooth Amplifier DIY Kit】: The Soldering Project DIY Kits are used to installed to an electronic transparent stereo speaker with high-power speakers, colorful LED flashing lights and transparent Acrylic shell. This Electronic DIY kit help you to learn basic electronic knowledge and circuit principles, and practice soldering skills enjoyably for you and your kids, or students, or DIYers.

Great Electronic Soldering Project】: Great School Science Experiment and STEM Learning Project kit for soldering practice and also suitable for family education. Not only to improve your soldering skills, you will also will be more familiar with electronic components and learn more interesting electronics things.  

Easy Installation】:The bluetooth module board is soldered and can be used directly after connection. You only need to solder the Led flashing light kit, connect the wires, and assemble the shell. Fun and entertaining, build your own bluetooth Speaker by yourself, a cool project and challenging enough to be fun.  About power: 5V mobile phone charger or computer power supply can be used, the sound quality will be better when the current of the power supply is 2A.

Download Instruction here:

https://attach01.oss-us-west-1.aliyuncs.com/IC/DIY-Manual/GY19298.pdf


2021年3月26日星期五

ICStation Weekly New Products: MAX30102 Pulse Oximeter Heart Rate Sensor +5.8G Microwave Radar Sensor

Dear friends,

Hope everything goes well with you! 

Today we are going to introduce 3 of our weekly new products, which was ordered by customers in a short time after sold on the website, hope you will find any of the one that you may like.

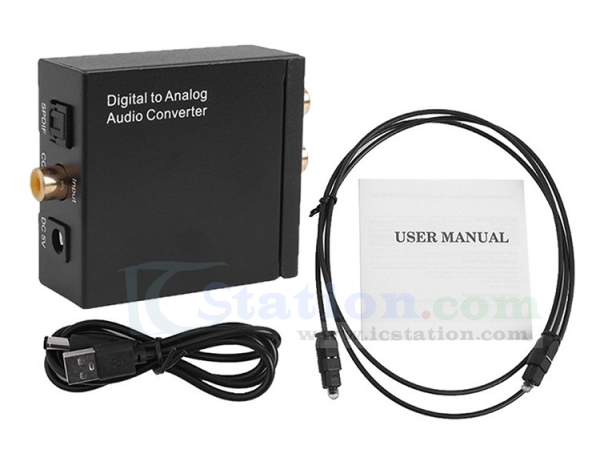
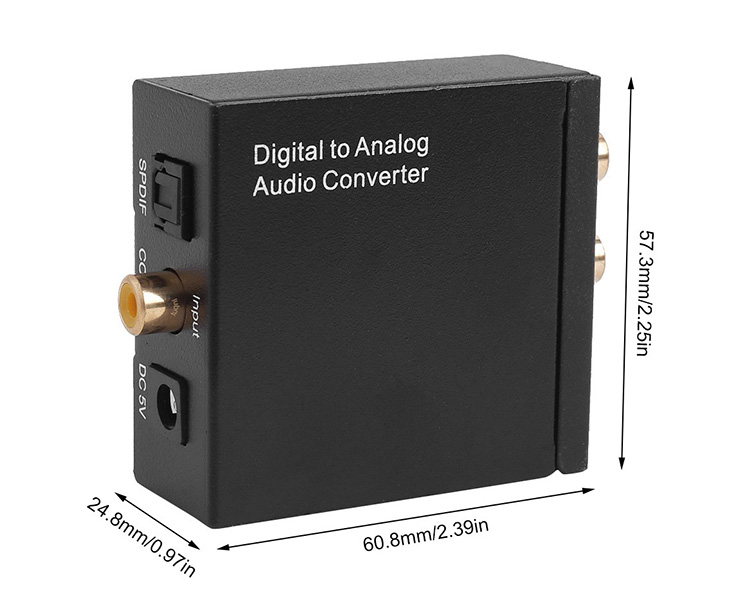
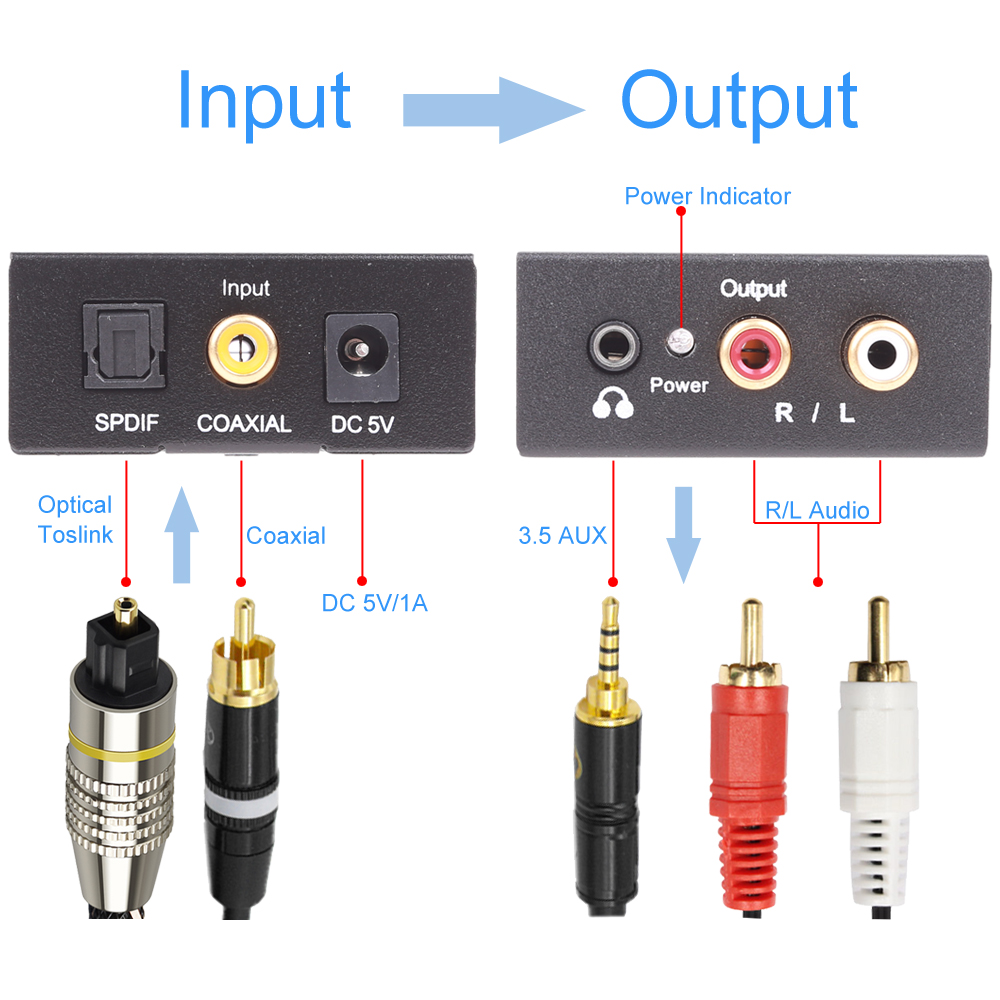
No. 1: DAC Digital to Analog Audio Converter Coaxial Toslink to Analog Stereo L/R RCA 3.5mm Jack Audio Adapter with Optical Cable


The device successfully decodes perfectly and sends the audio signal without damage and noise into the audio amplifier! Achieve perfect high fidelity lossless audio output function! Perfect audio visual!

Updated Digital to Analog Audio Converter】: It converts coaxial or toslink digital PCM/LPCM audio signals to analog L/R RCA and 3.5mm Jack Audio (not capable of being reversed). This Digital to Analog Audio Converter is designed for either home or professional audio switching.

It can be used in digital LED TV / cloud TV / Apple TV / blue ray machine / network player / XBOX360 / computer optical fiber coaxial output sound card / digital set top box / network TV box and other electrical equipment with SPDIF coaxial audio / digital optical fiber audio output equipment which can use this converter to convert to analog audio signal L/R channel output.

96KHz Sampling Rate】: Supports sampling rate at 32, 44.1, 48 and 96KHz; 24-bit S/PDIF incoming bit stream on left and right channels. Provides electromagnetic noise-free transmission.  

Easy operation & Wide Application】: With an optical cable and a coaxial cable to transmit digital or analog signals respectively, powered by (5V 1A) USB power cable(Does not come with adapter). Easy to install and simple to operate. 


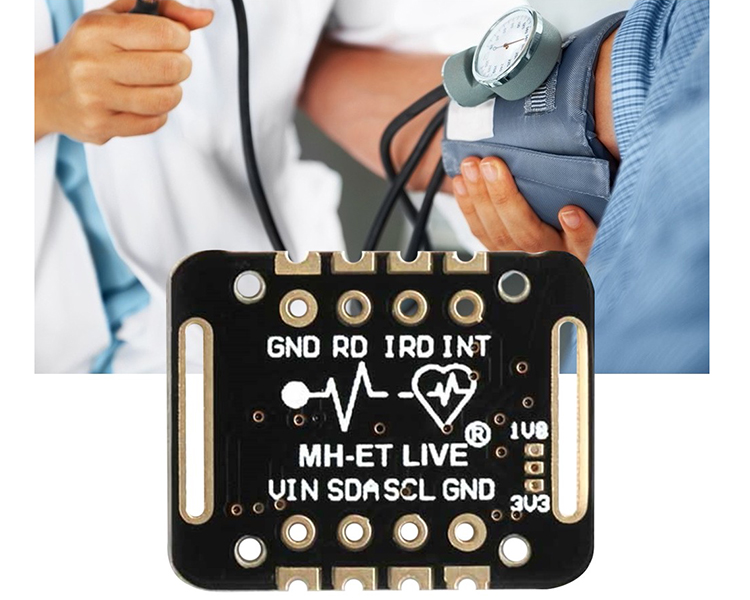
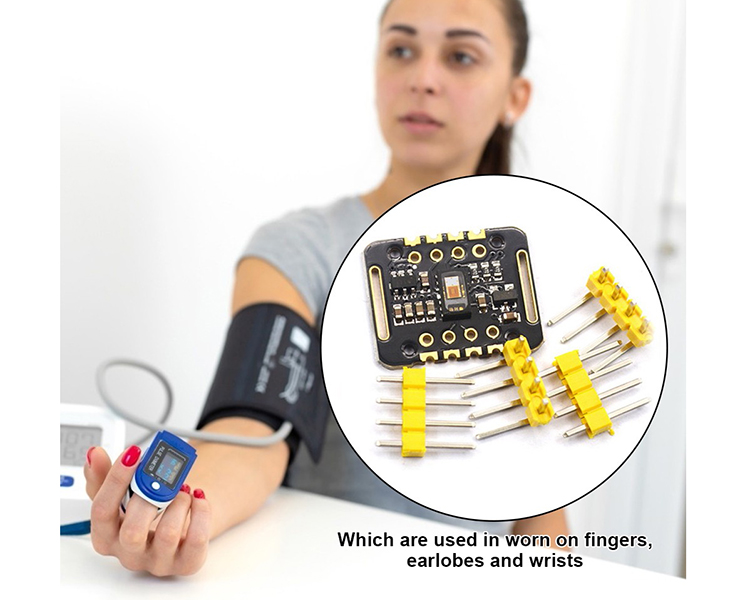
No. 2: MAX30102 1.8V-5V Pulse Oximeter Heart Rate Detection Sensor


MAX30102 blood oxygen concentration sensor. An integrated pulse oximeter and heart rate monitor biosensor module.

It uses an 18V power supply and an independent 50V power supply for internal LEDs, which are used in wearable devices for heart rate and blood oxygen collection and detection.

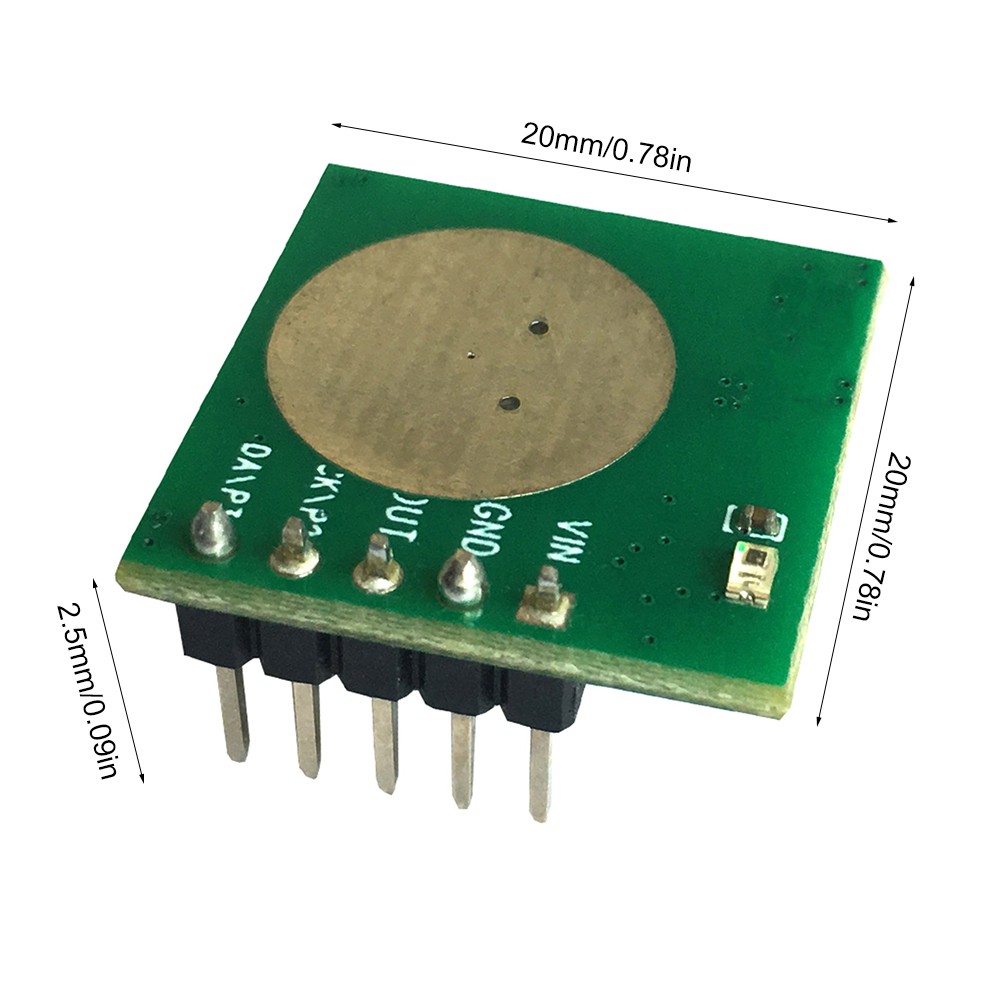
No. 3: 5.8G Microwave Radar Module Infrared Human Body Detector


This is an ultra-low power 5.8G microwave radar module with a working current of only 68uA. 

Combines the high performance of microwave induction and the ultra-high cost-effectiveness of infrared induction. 

Its sensing distance and delay time can be adjusted.
It can perfectly replace infrared pyroelectric induction and make up for the lack of infrared induction. 

Thank you for your attention! For more new products, please check ICStation.com:)

2021年3月10日星期三

Latest Hot Sale New Products!!! FM Radio Wireless Receiver Kits and DC-DC Power Module Recommended!

Dearest Friends,

Much thanks for your support all the way! ICStation has run business for 8 more years now! 2020 is a hard year due to the unexpected COVID-19, many companies closed down, but because of your continues support, we still alive. We still able to provide new products, ship to most of the countries as usual now.

Recently we have some Hot sale new products, especially the FM Radio Kits were very popular and loved by customers. Now Let's look at our latest top 3 new arrivals ! They are might be a nice choice for your new electronics project at the beginning of March! 


It is an 87.0MHz-108.0MHz Wireless FM Radio Receiver DIY Kit. 
With a built-in 4-Bit Red Digital Tube display screen which can display the receiving frequency clearly.


General Features:
1.Automatically search for radio stations
2.Built-in volume adjustment
3.Automatic memory function after power off
4.Support 87Hz-108MHz receiver frequency
5.Built-in 5W power amplifier
6.Power saving mode with backlight off for 5 seconds

Parameter:
1.Product Name:FM Radio Receiver DIY Kit
2.Work Voltage:DC 4.5V~5.5V
3.Output impedance:8ohm
4.Output power:5W
5.Output channel:Mono
6.Receiver Frequency:87.0MHz~108.0MHz
7.Frequency accuracy:0.1MHz
8.Equivalent noise: >=30dB
9.Work Temperature:-40℃~85℃
10.Work Humidity:5%~95%RH
11.Size(Installed):83*69*53mm

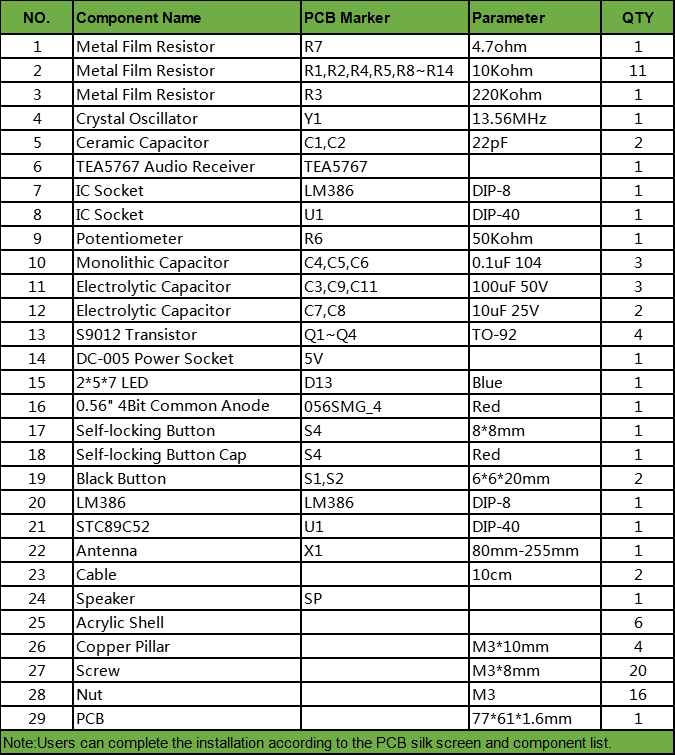
Component List:


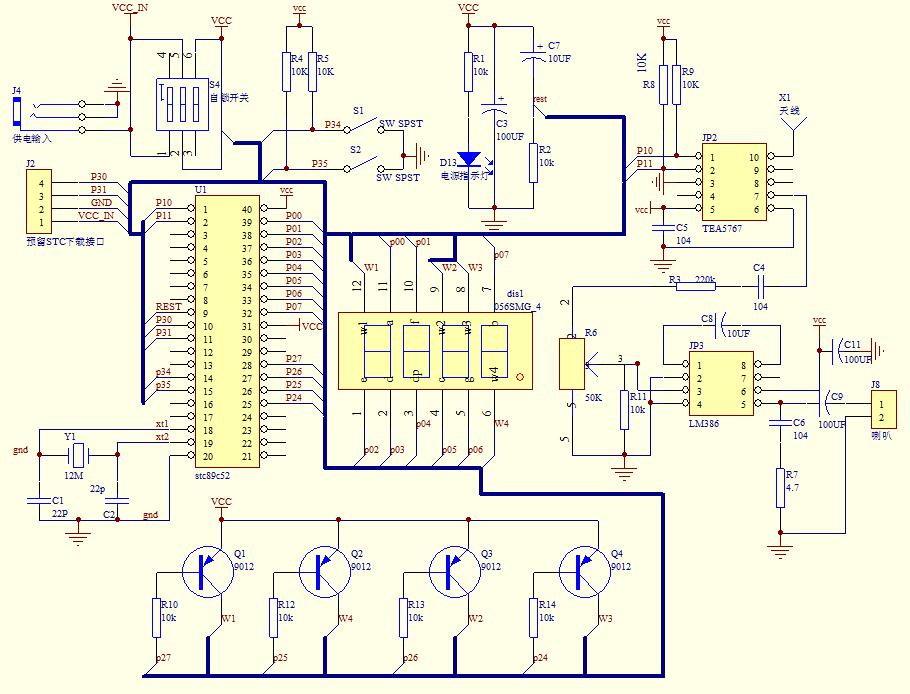
Schematic Diagram:


Notice:
1.The frequency can be adjusted continuously by keep press button.
2. It is a wireless module. So do not use it in an environment with signal interference.
3.The display can only show for 5 seconds and then enter to power saving mode.

Using Methods:
1.Press left button to decrease receiving frequency.
2.Press right button to decrease receiving frequency.
3.Rotate potentiometer to adjust the volume.

Installation Steps (Please be patient):
Step 1: Install 1pcs 4.7ohm Metal Film Resistor at R7.
Step 2: Install 1pcs 220Kohm Metal Film Resistor at R3.
Step 3: Install 11pcs 10Kohm Metal Film Resistor at R1,R2,R4,R5,R8~R14.
Step 4: Install 1pcs TEA5767 Audio Receiver at TEA5767.Pay attention to the installation direction.
Step 5: Install 1pcs 13.56MHz Crystal Oscillator at Y1.
Step 6: Install 2pcs 22pF Ceramic Capacitor at C1,C2.
Step 7: Install 1pcs DIP-8 IC Socket at LM386.There is a mark on one end of the IC Socket and there is a mark on PCB where the IC Socket can place on.These two marks are corresponding to each other and are used to specify the installation direction of the IC Socket.
Step 8: Install 1pcs DIP-40 IC Socket at U1.There is a mark on one end of the IC Socket and there is a mark on PCB where the IC Socket can place on.These two marks are corresponding to each other and are used to specify the installation direction of the IC Socket.
Step 9: Install 1pcs 50Kohm Potentiometer at R6.
Step 10: Install 3pcs 0.1uF Monolithic Capacitor at C4,C5,C6.
Step 11: Install 4pcs TO-92 S9012 Transistor at Q1~Q4.
Step 12: Install 2pcs 10uF 25V Electrolytic Capacitor at C7,C8.Pay attention to distinguish between positive and negative.The Longer pin is positive pole.
Step 13: Install 1pcs Blue 2*5*7 LED at D13.Pay attention to distinguish between positive and negative.The Longer pin is positive pole.
Step 14: Install 1pcs Red 0.56" 4Bit Common Anode Digital Screen at 056SMG_4.Pay attention to the installation direction.
Step 15: Install 1pcs DC-005 Power Socket at 5V.
Step 16: Install 3pcs 100uF 50V Electrolytic Capacitor at C3,C9,C11. Pay attention to distinguish between positive and negative.The Longer pin is positive pole.
Step 17: Install 1pcs Self-locking Button at S4.
Step 18: Install 2pcs 6*6*20mm Black Button at S1,S2.
Step 19: Install 1pcs DIP-8 IC LM386.There is a mark on one end of the IC and there is a mark on PCB where the IC can place on.These two marks are corresponding to each other and are used to specify the installation direction of the IC.
Step 20: Install 1pcs DIP-40 IC STC89C52.There is a mark on one end of the IC and there is a mark on PCB where the IC can place on.These two marks are corresponding to each other and are used to specify the installation direction of the IC.
Step 21: Install 1pcs Antenna at ANT.Note that the antenna should be installed on the back of the PCB.
Step 22: Connect speaker to PCB at SP by 10cm red/black Cable. The speaker does not distinguish between positive and negative.
Step 23: Tear off the protective film on the surface of the acrylic shell.
Step 24: Fixed speaker on acrylic bottom plate by 4pcs M3*8mm Screw and 4pcs M3 Nut.
Step 25: Install 4pcs M3*8mm Screw and 4pcs M3 Nut on PCB.
Step 26: Install 4pcs M3*10mm Copper Pillar on PCB.
Step 27: Install 4pcs M3*8mm Screw and 4pcs M3 Nut on acrylic front plate.
Step 28: Install PCB module on acrylic front plate.
Step 29: Fix other acrylic plate by 12pcs M3*8mm Screw and 12pcs M3 Nut.
Step 30: Connect to power supply and enjoy the effect.


DIY Kit FM Radio Module Adjustable 76-108MHz Wireless Receiver LCD Display DC 3.7V 5W 8ohm Speaker


Feature:
1.HD display LCD display screen
2.Support storage of 22 radio stations
3.Automatically search for radio stations
4.Built-in 30-level digital volume adjustment
5.Automatic memory function after power off
6.Support 76Hz-108MHz receiver frequency
7.Built-in rechargeable module
8.Built-in 5W power amplifier
9.Power saving mode with backlight off for 20 seconds
10.Support speaker and earphone audio output

Parameter:
1. Work Voltage:DC 3.0V~5.0V
2.Output impedance:8ohm
3.Output power:5W
4.Output channel:Mono for speaker and Dual channel for earphone
5.Frequency:87.0MHz~108.0MHz(Disable Campus Broadcasting Band)
6.Frequency:76.0MHz~108.0MHz(Enable Campus Broadcasting Band)
7.Equivalent noise: >=30dB
8.Work Temperature:-40℃~85℃
9.Work Humidity:5%~95%RH
10.Size(Installed):118*87*27mm

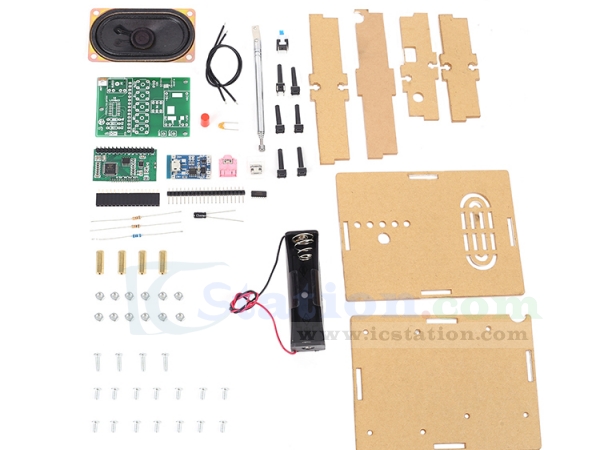
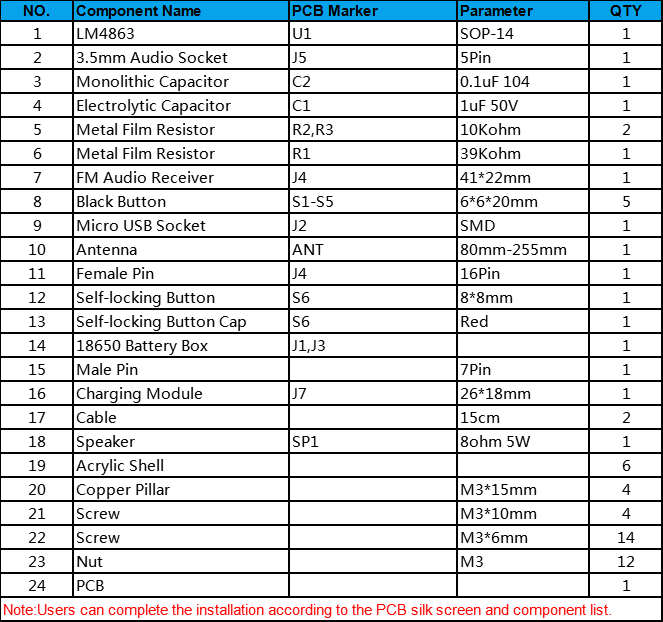
Component List:


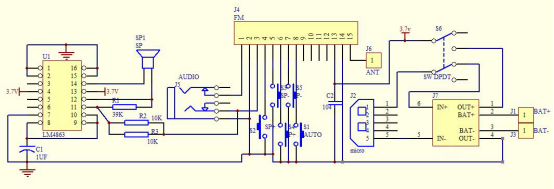
Schematic Diagram:


Notice:
1.It cannot receive radio while it is charging.
2.It is a wireless module. So do not use it in an environment with signal interference.
3.Input charging voltage form micro USB on the bigger PCB.

Installation Steps:
Step 1: Install 1pcs 39Kohm Metal Film Resistor at R1.
Step 2: Install 2pcs 10Kohm Metal Film Resistor at R2,R3.
Step 3: Install 1pcs SOP-14 IC LM4863 at U1.There is a mark on one end of the IC and there is a mark on PCB where the IC can place on.These two marks are corresponding to each other and are used to specify the installation direction of the IC Socket.
Step 4: Install 1pcs micro USB socket at J2.
Step 5: Prepare 6pcs pin header.
Step 6: Install 1pcs Charging Module at J7 and fix by 6pcs pin header.
Step 7: Remove black fixed block from 6pcs pin header and fix Charging Module.
Step 8: Install 1pcs 0.1uF Monolithic Capacitor at C2.
Step 9: Install 1pcs 1uF 50V Electrolytic Capacitor at C1.Pay attention to distinguish between positive and negative.The Longer pin is positive pole.
Step 10: Install 1pcs 3.5mm Audio Socket at J5.
Step 11: Cut a pin from 16Pin Female Socket.
Step 12: Install Female Socket at FM.Pay attention to the direction of the cut pin.
Step 13: Install 1pcs Self-locking Button at S6.
Step 14: Install 5pcs 6*6*20mm Black Button at S1-S5.
Step 15: Install 1pcs Self-locking Button Cap on Self-locking Button.
Step 16: Install 1pcs Antenna at ANT.Note that the antenna should be installed on the front of the PCB.
Step 17: Install 1pcs 18650 Battery Box at J1,J3.Pay attention to the positive and negative.Red wire is positive pole.
Step 18: Install 2pcs 15cm black Cable on speaker.
Step 19: Connect speaker to PCB at SP. The speaker does not distinguish between positive and negative.
Step 20: Install 1pcs FM Audio Receiver on Female pins.Pay attention to the direction of the cut pin.
Step 21: Tear off the protective film on the surface of the acrylic shell.
Step 22: Install 4pcs M3*15mm Copper Pillar and 4pcs M3*10mm Screw on Acrylic bottom plate.
Step 23: Fixed speaker on acrylic bottom plate by 4pcs M3*6mm Screw.
Step 24: Install 3pcs M3*6mm Screw and 3pcs M3 Nut on Acrylic bottom plate.Note that the wire should not be placed between the PCB and the acrylic.
Step 25: Fixed main PCB on acrylic bottom plate by 3pcs M3 Nut.Note that the wire should not be placed between the PCB and the acrylic.
Step 26: Adjust the position of the battery box. Do not place the wires under the battery box. The wires can be moved to both ends of the battery box.
Step 27: Fix other acrylic plate by 6pcs M3*6mm Screw and 6pcs M3 Nut.
Step 28: Connect to power supply and enjoy the effect.

Use Method:
1.Keep press AUTO button to automatically search and store the radio stations that can be listened to.
2.Automatically name searchable stations like P01,P02,P02 and so on.
3.Press P+ and P- to switch saved stations.
4.Press V+ and V- to adjust volume from V00 to V30.
5.Switch Campus Broadcasting Band: Keep press V+ and V- before power ON and then turn ON work power switch. It means enable Campus Broadcasting Band if display C1 on LCD. It means disable Campus Broadcasting Band if display C0 on LCD.Available after restart.
6.Enable backlight mode: Keep press P+ and P- before power ON and then turn ON work power switch. It means keep backlight ON if display B1 on LCD. It means the backlight will turn OFF after 20second if display B0 on LCD(This is the power saving mode). Available after restart.
7.It can output audio from speaker and earphone jack. The speaker of the module does not work when the earphone is connected.


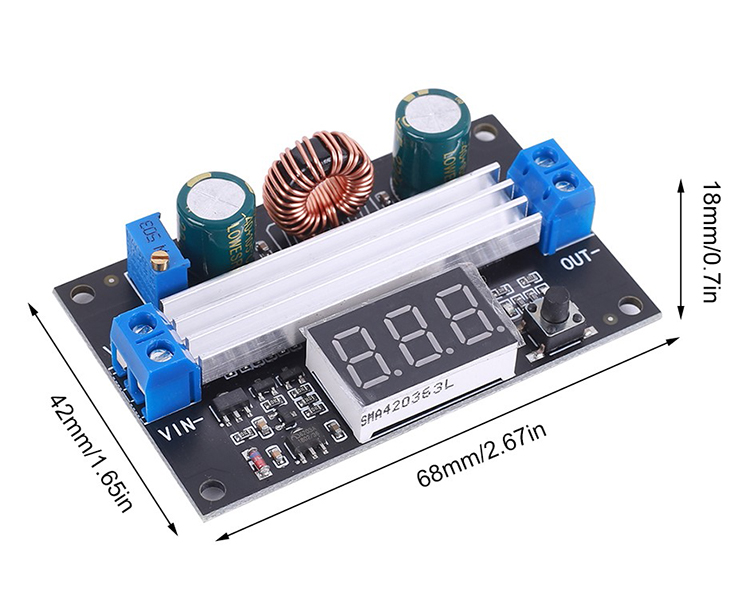
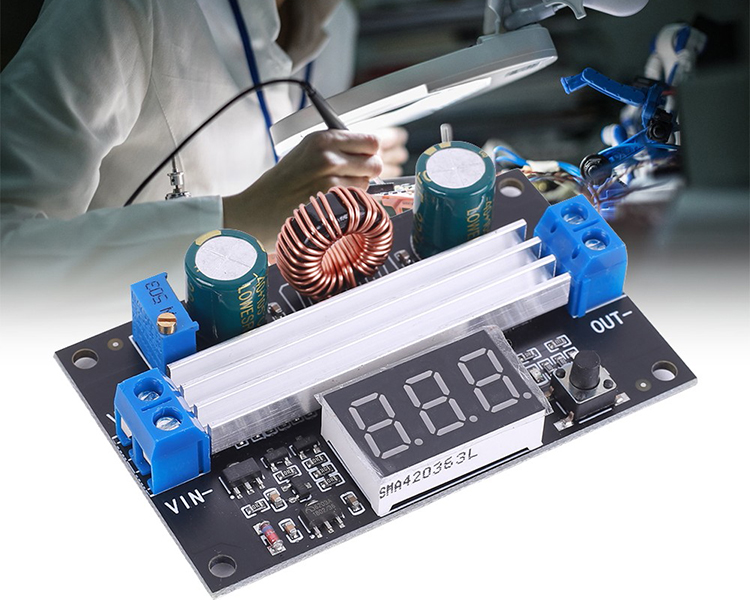
DC-DC Boost Power Supply Module DC 3V-35V to DC 3.5V-50V 6A 100W High Power Digital Display

Product Introduction:
It is a booster board, the output voltage is greater than the input voltage. When the output voltage is less than 4V, the onboard voltmeter will not work.

Feature:
1.It has a digital display to display voltage.
2.Its conversion efficiency is high.
3.It has an output voltage potentiometer to adjust the voltage in time.
4.It has a display switch button to switch between input voltage display and output voltage display.

Parameter:
1.Product Name:Boost Module
2.Input Voltage:DC 3.3~35V
3.Input Current:9A(Max)
4.Output Voltage:DC 3.5~50V
5.Output Current:6A(Max)
6.Output Power:100W (input voltage greater than 12V can reach the maximum output of 100W)
7.Conversion Efficiency:96%(Max)
8.Output Ripple:40mV(TYP)
9.Range of Onboard Voltmeter:3~55V
10.Work Temperature:-25℃~85℃
11.Work Humidity:5%~95%RH
12.Size:68*42*18mm

Instructions for Use:
1.The voltmeter can be turned off.Press and hold the switch for 4 seconds,and then it can be turned off by letting go.

2.Input and output voltage measurement error calibration function,long press the switch for more than 4 seconds,after letting go,it will enter the voltage measurement error calibration function.

3.The digital tube flashes to display the voltage calibration ratio value (range -5V~5V).At this time,short press the button to change this value (cycle between -5V~5V).

4.When the voltage value displayed by the voltmeter is too high,lower the reference value (adjust to a negative number).

5.When the voltage value displayed by the voltmeter is low,increase the reference value (adjust to a positive number).

6.After adjusting to the reference value you want,press and hold the button for more than 2 seconds. After letting go,save the set value and return to the normal display voltage.The set correction value will take effect immediately and will not be lost after power failure.


Thanks for your time! We will have more new arrivals soon! 

LED Rotating Globe Planetary Project for STEM Teaching and Soldering Learning

Explore ICStation Latest New Product -   DIY Globe Planetary Motion Kit DIY Rotating Universe Model  Soldering Practice Kit! The Flashing LE...